Showing posts with label hairspray. Show all posts

Tuesday, February 9, 2016

Vaporeon Gijinka - Wig & Hairpieces - Pokémon


Part 4 of the Vaporeon saga--Wig and Hairpieces. After my initial rocky start, I quite enjoyed creating the decorations for this wig. Though not the most construction heavy wig (like my Presea or Asuna wigs) it required a lot of labour and styling. This wig presented a new challenge for me: dyeing.

Links to Part 1: Bolero, Part 2: Under Layers, and Part 3: Wrap Skirt Tail!

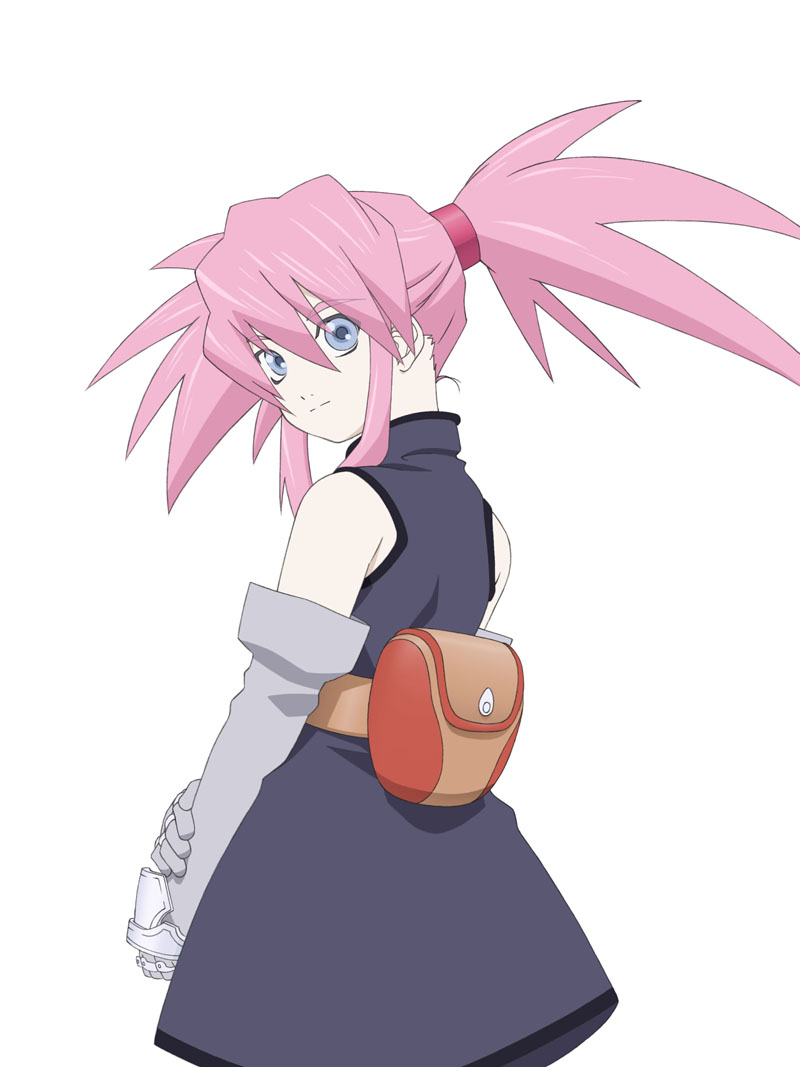
Thanks to Elemental Photography for the great photoshoot! Credit for the original costume design goes to Cowslip!

It's a complaint I have made many times before but I'll say it again: it is really difficult to find a base wig that perfectly matches your character if you need it to be a specific shade of grey, green, blue or purple. And even if you find one that matches you may not be able to find it in the length you need. I had similar problems with finding a wig for Tomoyo and Suppi because they fell into this colour spectrum where there is just not a lot of wig selection.

My problem was that I ordered my wig first, before I went fabric shopping. The wig I picked was a teal wig from Epic Cosplay (though it is really difficult to see here, believe me when I say it is really teal). When I was shopping for fabric I ended up shifting the colour palette to be more blue. When the wig arrived in the mail it really didn't match the costume. Also the wig I picked did not have enough length for the desired style...

(For the record, I don't blame Epic Cosplay for the teal wig, I blame myself for choosing a teal wig and then changing my mind about making the costume blue!)

At the time I was still under the impression that I could meet my original deadline, so I didn't have time to order another a wig--it wouldn't have arrived in time for me to style it.

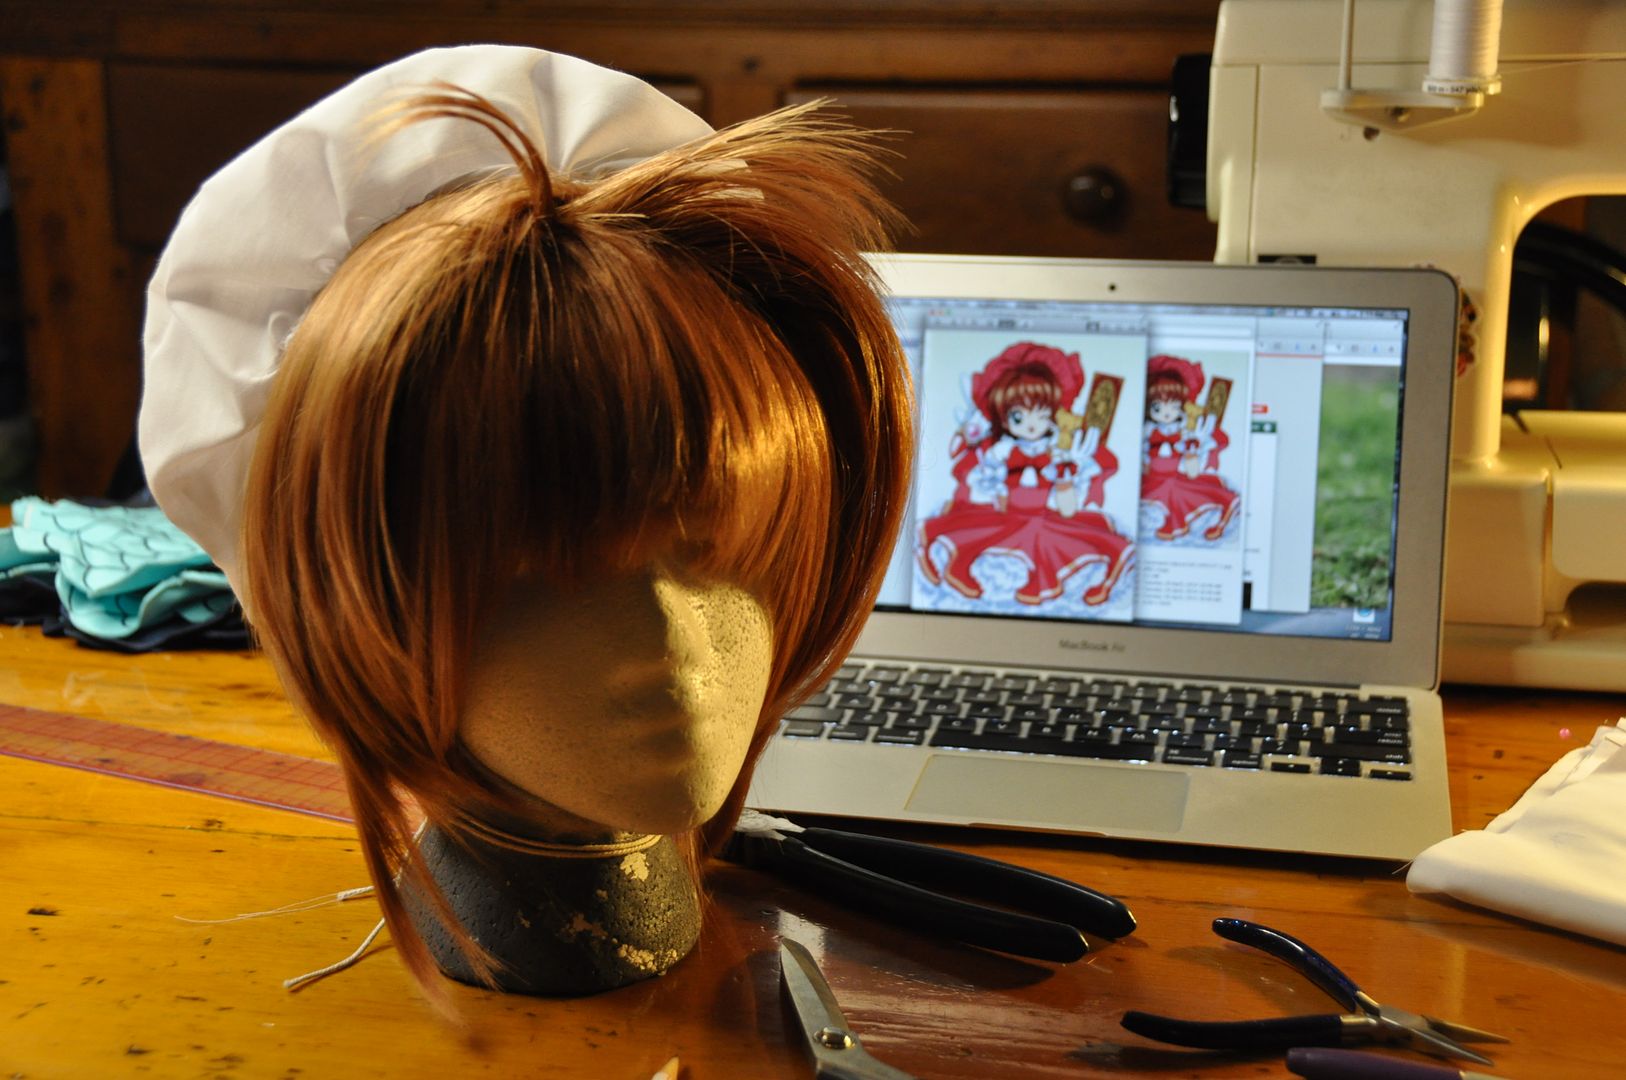
I went ahead and styled the wig I had, but was super dissatisfied with it. Shown right is the original wig I styled with the original hairpieces I ended up later discarding.

A year later I re-thought my plan for this wig and decided that I really wanted to attempt the slight gradient that is in the original rendering. To do this I needed to order another wig that was longer, and much lighter--so I could dye it to the desired colour.

The second wig I bought was much closer to what I wanted for my base. I ordered a much longer curly wig in "ice blue" from Epic Cosplay.

The first thing I did was trim the bangs to the desired length/style. Then I sectioned off the remaining hair into 4 parts: the two lower pigtails would form the long braids, and the two upper pigtails would form the buns. The lower pigtails I took scissors to and thinned the hair. The bottom needed to be these two wisps rather than the chunky sections you can see in the picture on the left.

I changed the design of the hair a bit, because the upper part was actually supposed to have a lot volume before feeding into the braids, with these spikes of shorter hair sticking out. After the problems I encountered on my first failed styling I decided to add the buns to the top half and use the curls in the wig to create the shorter strands of hair sticking out. This gave me the width/apparent volume without me having to tease it/add it in with hair spray. Suffice to say because the wig was curly I was worried that any attempt to add volume was going to lead to a messy tangled disaster... So the deviation from the actual design was quite intentional.

Looking at some tutorials, I began by creating my dyes. I tested them of the off-cut hair from the bangs until I was satisfied with the colour. The dye was made using 99% alcohol and india ink. I created two bottles of dye--one that was blue and one that was more teal. There was no scientific formula for mixing these, I just added drops of ink until the colour was dark enough. Just write down what you did because if it is a long wig like mine was, you will probably have to make more. Which I did.

The bottles of 99% alcohol I bought already had these hand spray nozzles, but if not I would have bought spray bottles at the dollar store and mixed my dye in there. That makes the application easy.

I did this outside, because I didn't want to end up with blue dye residue everywhere. As it was, my fingers were blue for days after. I covered my stool (which is vintage and actually belongs to my mum) with a heavy duty garbage bag to protect it also.

I started with the bangs. To apply it I simply spritzed it with dye and combed it through. The more saturated you make it, the darker the concentration of colour. In the design, the crown of the head is where the darkest tint is, so I did the bangs first so as to give myself a reference point to compare to for the gradient.

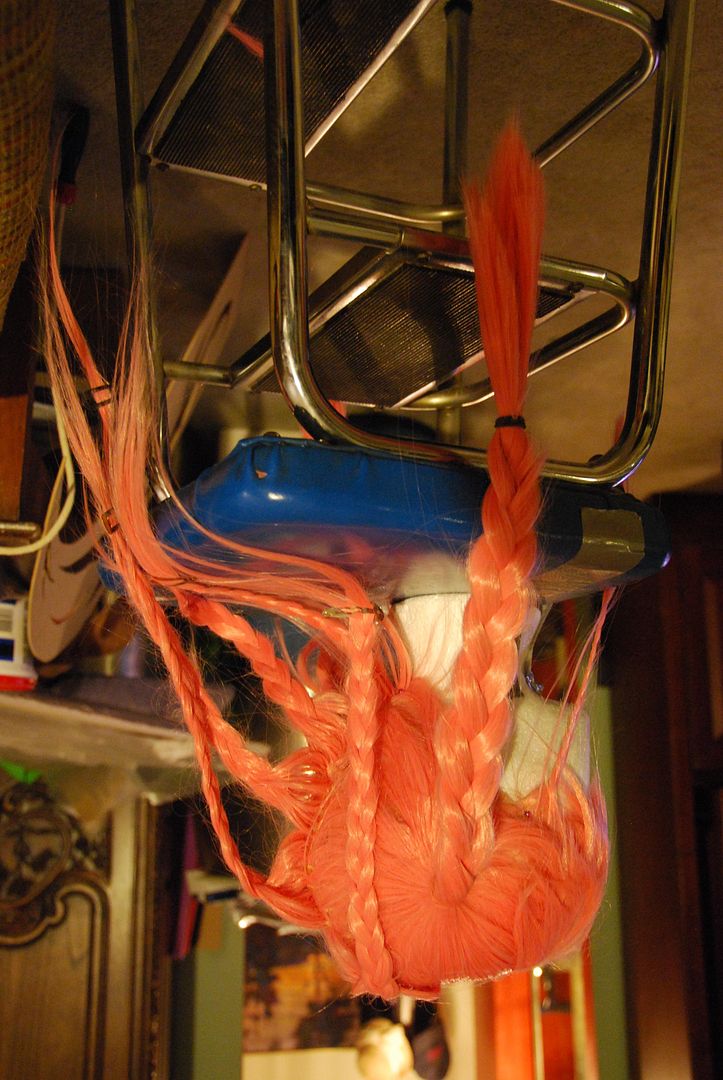
I tied the upper layers out of my way and worked on each bottom pigtail next. I would let down the pigtail and carefully comb out the hair. Since I was trying to preserve the curls and keep the wig from tangling, I dyed each curl individually. Once That section was finished, I would carefully roll up the curl and pin it in position, allowing it to dry. If you leave them hanging wet it can straighten the fibers out a bit, leaving the wig more wavy than curly--which can be a good thing, but not what I was going for. To give it the gradient it had to be most saturated at the base, and I would carefully comb it down to pull the dye down through the hair.

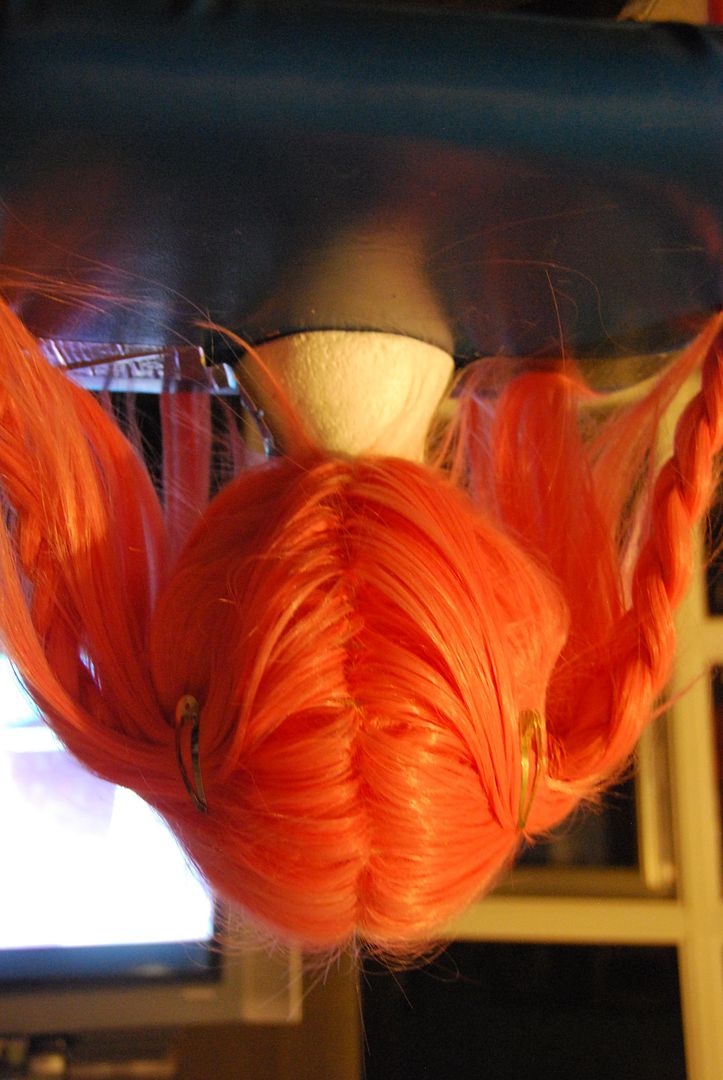
You can see at the back that I parted the hair in a sharp zig-zag so as not to reveal the base of the wefts/netting. This was to save me from having to add in wefts to make a proper part. This works fine for this particular project since the lower half of the hair did not have to pull upwards into the high buns.
Using straight pins and plastic bags, I covered the bottom half of the wig while I worked on the top half.

The top half was done to be much darker than the bottom. I simply made it more saturated with dye. Same with the bottom, I did each curl individually and pinned it up to dry.

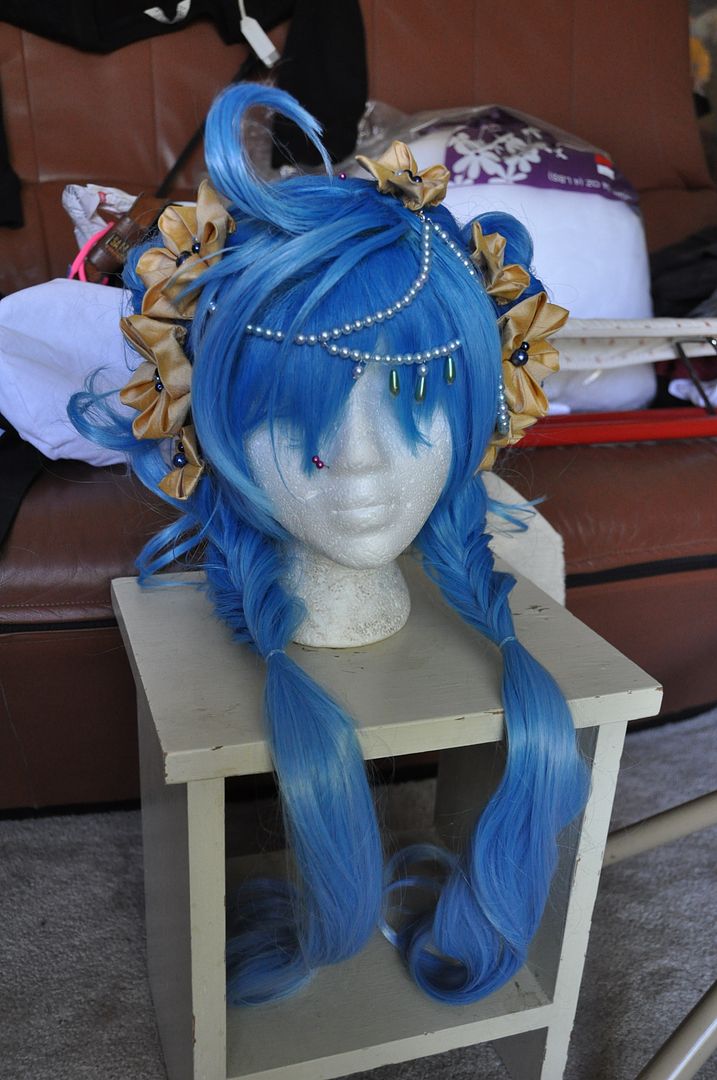
The finished dye job, before I brushed out the curls again. You can see the gradient best here. It was meant to be subtle, and mostly to match the wig colour to the costume. I think if I would revisit this wig I would make the crown another shade darker.


This is what it looked like once I brushed it out.

Next I went about styling the sections. I did a quick test style first (pictured left). Many bobby pins were used to create the buns. The lower braids were done in a fishtail braid style. I didn't pull the braiding too tight at the start of the braid, because I wanted it to retain some volume. I sprayed the finished braids and buns with hairspray to keep them looking tidy. I later replaced the black elastics with clear ones.

After doing the back, I moved on to styling the bangs. I used hairspray and a hair dryer to create the big curl and the large section that crossed over.

I decided to take my scissors and thin the ends of the hair even more. Reducing volume, but not length.

I made the silk flowers for the hair in a kanzashi style, like I did with my Cloche Hat last year. A good tutorial for how to make them can be found here! I sewed an assortment of beads into the center of each. The beads on this costume are a range of colours: navy, medium blue, pearly blue and teal. Each flower was hot glued onto a hairclip base. The barrettes I used had a little hole in each end, this came in hand later for attaching the bead strings.

I strung the beads on tiger tail and used claw hooks to attached the ends to my barrettes. This means they are removable.

Overall this wig was super fun to make and looked great. As much as it hurt my pride to do so, I am glad I scrapped the first wig and started again fresh.


Friday, October 30, 2015

Sakura - Wig, Hat & Accessories - Cardcaptor Sakura

Part 3 of Sakura (1st Opening outfit)--lets talk accessories! The details are really what make this costume. If you want to see how I made the wings, go here! If you want to see the rest of the outfit, go here!

I entered this costume in the Friday night Workmanship Competition at Anime North in 2014 and won an award for Best Accessories in my category. That was pretty cool. It was my first (and so far only) time entering in a competition without a stage presentation component.

Once again, thanks to EleventhPhotograph for the photoshoot. I really love this black and white shot.

First we'll talk about the wig. I started with EpicCosplay's Aura in cocoa brown. I think this colour works really well for Sakura, it's not too brown or too blonde. It's almost a bit reddish. I think the colour works well on both my sister and myself.

Since I was doing a costume of hers with a hat, I didn't bother to add her iconic pigtails that she normally wears, because they wouldn't be visible. This has influenced my costume choices for my subsequent Sakura costumes to only be ones where Sakura is wearing a hat. Because this means I don't have to go back and fix the wig. And also because her costumes with hats are ridiculously cute.

As you can see the wig was pretty long. I purposefully picked a longer wig because she has those two small sections of longer hair in front of her ears. It is much easier to cut a wig shorter than it is to add in longer wefts.


I started by trimming the bangs. Using clips I separated off the different sections of the hair. The longer pieces were separated from the sides and the bangs. I left the long wisps at the original length, and simply thinned them out a bit. The sides were thinned and layered and trimmed to length. Then I trimmed the back of the wig.

The last step was to style the front of the wig to give the top that volume. I pulled sections of the hair up and hair sprayed them at the base. Then I used a blow dryer to set it. I made some shorter bits stick up while the rest parted and fell to each side. This created the look of her cute bob at the front.

Next I started work on the hat. Since I had very limited pink fabric left, I made a mockup. The hat's construction was pretty simple. The pattern consisted of a circle and a rectangle. The rectangle was the length of the circle's circumference.

First I rolled over the channel where the elastic would go later and ironed that. I didn't stitch it down yet, but pre-ironing saved me a ton of headaches later.

The next step was to sew the rectangle to the top of the hat, right sides together. Then I sewed the two ends of the rectangle together and then top stitched the channel for the elastic. I left an opening in the channel so I could feed the elastic through. The elastic both gathered the hat and helped it to stay on. When I was satisfied with the fit, I sewed the elastic ends together and closed the channel opening.

Lastly the bow was attached to the hat. Credit for completing the finishing touches goes to my friend Alli who handcrafted all the bows and hand stitched them on.

Instead of constructing socks and gloves I bought them, and made ruffles to add to them to help them match the rest of the costume.

Like the hat band, the ruffles are simply rectangles with a channel on on side for an elastic, which cinches them to fit and gathers them into a ruffle. These were tacked on to the gloves and socks.

Little red bows were also added to the gloves.

The shoes were an extremely lucky find. I managed to find flats at Ardene's in the perfect shade of red. They matched my red fabric perfectly. I added the bows to the toe. This is not 100% accurate to the design, but I didn't feel like adding straps to the shoe--I was worried it would make them uncomfortable. The bows were hot glued on.

I paid attention to the details so that everything would match perfectly. I wanted to do Sakura justice, and I think I achieved that. :)

Wednesday, August 19, 2015

Toph (Fire Nation Disguise) - Wig - Avatar: The Last Airbender

This is my first post on Toph. Rather than the traditional green outfit, I decided to make her Fire Nation disguise outfit from season 3. Of all the nations, I really thought the Fire Nation had the nicest designs in the series, but Toph is one of my favorite characters--so this seemed like a good compromise.

This costume was originally supposed to debut at Otakon last summer, and I had managed to get everything finished except the wig and shoes. But without the wig, the costume isn't really wearable, so the costume went on the backburner for a while as I worked on the wig.

I really need to make time to do a real photoshoot of this costume. Perhaps next year...

I thought I would start by talking about the wig--easily the most difficult piece of the costume. This wig took me 3 attempts until I was satisfied with the end result.

It was a nightmare to construct, partially because the reference is so vague. All you can see is that she has a large black blob of hair at the back of her head--which is presumably a bun? I've seen people achieve this in different ways, some opting for a small bun (a bit of a cop-out, and not very accurate), others choosing to do an intricately braided style to create the mass. I wanted to create a smooth rounded "bun" that was as accurate as possible.

My main issue I encountered--which carries over to many costumes--is that I have a small head and not an abundance of hair. This means that 99% of all the wigs I ever bought are loose on me. Back in the day I had waist-length hair which I had difficulty stuffing under a wig, and this would keep it from slipping. But these days, any wig that is remotely back heavy slides out of position like nobody's business. It is a problem I have noticed since I have started to do more elaborate styled wigs (Asuna was a problem in particular because of the heavy metal bells).

To counteract this problem I have found the best way to keep a wig from sliding to to sew a small comb into the front of the wig and then french braid my actual bangs. The comb hooks into the braid and prevents it from sliding out of position. (I did the same thing on my Tomoyo wig.)

Black is such an easy colour of wigs to find, so I was not worried about finding a wig (for once!). To save myself some time, I ordered a ponytail wig from Epic Cosplay, this meant that I wouldn't have to also make my base wig into a ponytail wig first to cover the gaps in the wefts. Their ponytail wig is a short wig that comes with an extension you can wrap around the ponytail base to make it a long wig. This was great for my purposes, as the large extension would be put to use later in creating the bun.

I started by taking out some of the wefts from the middle of the back of the wig. This was done very carefully with a seam ripper. This was to remove bulk under the bun while also procuring more hair to make the bun with.

Out of some back fabric I made the base of the bun and loosely stuffed it. I hand stitched the wefts around the edge. I cut a hole in the middle of the fabric to stick the loose ends of the wefts in.

This is the point where I realized I wasn't going to finish the wig before Otakon, and put it on hold for a while. The next steps were done over the next couple of months before going on hold while I finished my degree and then finally finishing in the weeks leading up to AN.

After that I attached the bun at the top of the wig with a strong hand stitch. I tied the hair that would later be the bangs out of the way.

At this point I also made the wig slightly smaller smaller along the back with some darts that I stitched in to the netting. This helped it fit better. I also hand stitched the small comb into the front of the hairline.

Next I pulled the wig under the bun into a ponytail and stubbed it using regular white glue. Then I cut off the excess hair. 


I also stubbed the bottom of the hair that was draped over the top of the bun.


Next I cut and styled the bangs. The wig was quite thick at the front, so I had to thin it out a fair bit. Because although Toph's hair is supposed to fall into her eyes (which isn't a problem because the character is blind), I kind of needed to be able to see.

To finish off the wig I used some heavy duty hair pins to affix the bun in place.

Next I paper patterned the tiara/headband. Once I was happy with the pattern I cut out 2 pieces of worbla and laminated them together with a heat gun. This was to make it sturdier.

This part of the costume was done after I had finished my independent study on worbla, so I used some of the leftover materials to make this tiara/headband.

I molded some scrap bits of worbla into a long roll and used that to make the raised detail along the edge. Then I heated the whole piece and gently curved it into the desired shape.

Using a dremel with a drill bit, I drilled a hole through the center of the raised loops at each end.

I made the tassels shorter to be more accurate.

Here you can also see how the finished wig looks from the side. The bun is a little smaller than the actual character's hair, but I think this is a more manageable size. It is already insanely back-heavy!


Next was priming the surface for painting. Worbla tends to have a slight bumpy texture to it, so I used a couple of coats of gesso and gorilla glue as a filler.

I primered it with a red spraypaint. The red colour underneath helps to counteract the green-ness that is common in most gold paints. I gave it a light sanding, before doing a second coat of red.

I painted it using a bronze acrylic paint as my main colour and then a gold for the raised detail. It required a few coats.

Then I used a clear gloss spraypaint as my final layer, to seal it and give it some shine. "Metallic" acrylic paints tend to be more sparkly than glossy.

I looped the tassels through the holes I created earlier and hot glued them in place.

To attach the headband to the wig I hot glued a small metal comb and two ties to the inside of the tiara. The metal comb would hook into the wig and then the ties were tied under the bun at the back. This made it secure, but also easily removable.

And in a nutshell, that's how I made the wig. Hopefully I can get some more side shots of the wig at another con.

Wednesday, October 23, 2013

Presea - Wig - Tales of Symphonia


(Edit: Now with completed photos!)

This was my first time doing a pigtail wig. This method is more difficult, and far more time consuming, but less expensive than the method I used for Asuna's wig. For Asuna I bought a second wig and used the wefts from that to cover the netting at the back, but for Presea I chopped off the bottom half of the wig and used the leftover hair to make the wefts for the back. This only worked because Presea's pigtails only had to be longer than her shoulders (as opposed to Asuna's, which are supposed to be almost down to her knees).

In order to do this with one wig, I bought a 50" pink wig from Epic Cosplay.

(To see how I made the Dress, go here.)

For Presea's pigtails, I chose to go a little less extreme, I wanted them to have volume, but not be crazy/ gravity defying.


 To start, I divided what I wanted to be the front part of my wig (bangs and side burns). I made the bangs a bit choppy, making sure they covered some of the wefts that would be pulled into the pigtail underneath. I started with a lot of hair at the side, but thinned it out, and transformed about half of it into bangs.
I carefully parted the back of the hair along the center back of the netting.  Pulling the hair into pigtails I could see how much netting would be exposed. Also you can see how little volume is in those pigtails. (Some of it was added simply by adding all that extra hair in the back, the rest was done later with lots of hair spray.)

At this point I tried the wig on and figured out exactly how long I wanted the pigtails. I marked this point and chopped off the bottom of the wig, keeping all the loose hair carefully bundled.

Then I set about adding in the wefts. I took a large embroidery needle and would take small bundles of hair fibers lick the ends and thread them through. I would pull them about halfway through the needle. Then I would stitch the needle in and then out of the wig (from the outside). I would then pull one side of the bundle all the we through the wig. I would do this several times, then I would take caulking and smear it around the inside of the wig, sealing the fibers in place. Then I would wait for it to dry, then repeat.

(I totally marathoned "Murder, She Wrote", while making this wig. As the process is long, tedious, and does not require much brain power.)
 This was a messy process, and in the end it made the wig a bit lumpy. I cut out some of the excess lumpiness.

I had bought a heat sealer for this process, but it didn't work. It got hot, but wouldn't melt the fibers. We tried to contact the seller, but they ignored all our emails, so I was quite peeved that I spent 40$ (+shipping) on a useless piece of equipment.

With all the loose hair around it was much easier to braid all the sections I wasn't working on so the wig wouldn't become hopelessly tangled.

Then carefully, using a comb, I parted the back. Now it looked much better than when I started!
First I thinned out the bottom of the pigtail, so it would look so straight cut. The layers helped make it look more spiky/punkish.

The next step was to add some volume to those pigtails. I tied the pigtails with elastic bands (normal hair ties slip too easily). I pulled the pigtail apart at the base and used a liberal amount of hair spray, using a hair dryer to help it dry faster. (The brand of hair spray I use it Got 2B Glued, in combination with a hair dryer it works wonders.) I would then pull sections and spray them individually, trying to make the pigtail as wide as possible. (Look a the picture on the left to see the pigtail without hairspray, and the one with.)

Then this wig was ready to be worn! Unfortunately the costume was not! This wig had to wait a whole year for it's debut!

I am not 100% satisfied with the full finished costume, and I plan to do some major touch ups on the battle axe, which got damaged during the trip to Baltimore. Then I will do a photoshoot so you guys can all see pictures of the finished costume!