Showing posts with label sleeves. Show all posts

Sunday, October 30, 2011

10th Doctor

Hello again! This is an in-depth look at how I made my 10th Doctor costume... Now when I say that, what I really mean is an in-depth look at how I made a blue blouse and altered a women's suit. And was extremely lucky at thrift stores.

Yes.

I was at a thrift store, when I discovered this amazing brown suede long coat. Once I tried it on, I knew I had to buy it and one day do a 10th Doctor costume, perhaps in the far future. Not 2 days later I found a brown and blue pinstriped suit in another thrift store and I thought, "DESTINY!?" So I decided to make the rest of the costume for fanexpo. >:D

Lets take a look. As the doctor would say, "Allons-y, Alonzo!" >:D


So I found a basic blouse pattern in the basement storage with my mum's sewing patterns. But she lost the instructions... So we had to guess how the heck it should be put together. She had actually pinned it to some really 70's looking fabric to make a blouse back in the day, but never did. So I took those pieces too. I will one day make that blouse also.

I was originally planning on tea-dying my blue fabric to make it a bit darker, but I ran out of time.

I cut out all the pieces and started by sewing the collar together.

After much confusion, we managed to figure out how the placket at the front was supposed to be sewn together.


Beautiful! :D


The collar was then flipped right side out, corners clipped and pressed. It was then sewn to the other collar piece. 

I sewed the back and front pieces of the shirt together at the shoulder seams only, then finished those seams nicely.


I sewed the cuff pieces, flipped the right way out, and pressed them, same as the collar.

Then I took the pants in. And then I took them in some more. I may still do some more altering to the suit and pants, as I am not entirely satisfied with them at this point. 


Trying to decipher what these marks are supposed to mean...

Some were the pleats and the other was a slit that I put some bias tape around the edges of.

The cuffs were then sewn to the sleeves, and the sleeves were sewn to the shirt.

The buttons were the last thing to add. I got my mum to do the holes for me as I had never done any before and didn't want to wreck the shirt.

And then it was done!!! >:D Brilliant!


I was attacked by a Dalek! D: But he soon realized that my screwdriver was not as sonic as I had originally hoped! "THAT IS NOT A SONIC SCREWDRIVER."

Actually, funny story: I needed a hat stand for my display, and so we bought one at ikea. And we put it together with my screwdriver. MOST USEFUL PROP EVER.

I met like a million more doctors at the con. Lots of 10ths. But I was the only girl. :( And I was way shorter. They called me mini doctor. I was not amused.
Those observant people may have noticed that I actually darkened my eyebrows for this one! It helped make the wig look more realistic. Next in-depth look is at how I achieved styling this amazing wig! >:D


Saturday, June 11, 2011

Cousin Miso - Dress & Shorts

Hey all! I'm back with another detailed progress gallery! This time it's the outfit for Cousin Miso! :D I made this for my sister about a week before the con, after finishing the feathers on my mask, and before I started the cursed foam coat. I was able to finish this completely in a few days, without too much trouble (which was a nice change).

Cousin Miso is just SO cute! I love Katamari, what a great game!


Somehow I managed to forget to take any progress pictures of the beginning of this project, but I basically just traced a pattern from a t-shirt that fit her comfortably, morphing that into a short A-line dress and working from there. I put a seam in the back to make it easy to put a zipper in. It ended up being too long, so I shortened it.

Alex made the roll that goes around the bottom of the dress/shirt. A simple tube stuffed with leftover bits of cotton batting.


 The collar was simply a rectangle that I folded over. I pinned it securely and the ditch-stitched it on.

 Oh look at my fingers. They are so beautiful. I just love how my ring-finger sticks out at a bizarre angle... -_- Yeah, that's all natural.

Anyway, the collar was finished off at the back with a few dome fasteners. (Because I just love them so much.) I decided to put it in after the zipper for the simple reason that I've had too many problems putting in zippers where there are a lot of layers and am now purposefully trying to avoid doing that to myself again (see: Floral Pouffe Dress.)


 I realized that in order to have a the mittens be part of the sleeve, I would nee to have 2 seams in the sleeve, but I realized that if the 2 seams were top and bottom of the sleeve the fabric would have to twist and put a lot of wrinkles into the sleeve. So I decided to put a seam on either side of the sleeve, which worked out quite well. To make this part of the pattern, I traced the armhole, and then measured the circumference of my sister's arm every 2 or 3 inches down her arm to get a form fitting sleeve. I decided to add an extra 1/2" to ensure movement, because I wasn't sure how well the fabric would stretch. As it was, the 1/2" was unnecessary, and if I get a similar type of fabric for my cousin, I will not add as much.

 Some progress shots. Alex was working away on her bloomers. They were patterned of a pair of her shorts which she then added about 20 extra inches of fabric to make them nice and pouffy. She left extra fabric at the top and bottom to do a roll in which she could put some elastic.

 These are all the pieces of one sleeve laid out. The top of the sleeve is one piece, while the bottom is 2 pieces. (So I could have a slight overlap where there is a hole to slide her hands out. You know, so she doesn't have to take the costume off if she needs to use her fingers.) I finished the seams at the place where the 2 bottom pieces meet. Then I pinned it with front sides together and sewed the sleeve.

 The finished bloomers. Looking good. You may also notice her shoes, which match her tights rather nicely. Recognize them? Yeah, those are mine. From my Kiki costume.

 2 finished sleeves. I ended up having to modify them at this point, because the gap was too far up her wrist and she couldn't easily get her hands out.

Also I don't know why, but this picture just reminds me of Thing 1 and Thing 2 from 'Cat in the Hat'.

 All sewn together! I ended up taking in the sleeve at the shoulder seam a bit because the fabric was loose there.

I pinned the edge of the dress to the roll. Not easy. Or fun.

 I sewed it all together. Less easy and even less fun. My finger got grazed by the sewing machine several times creating a nice bruise under the nail.

The roll was then measured and hand stitched together at the back, and then the rest was machine stitched to the garment.
I'm really pleased with how this on turned out! I definitely want to make companion costume for this one. Miso needs more friends~! XD

Tuesday, June 7, 2011

Crow Soldier - Cape & Cowl


Hey all! This is the sewing post for the Crow Soldier! (And the final in-depth look at this costume) I don't take all the credit for this particular piece, as my mum was called in to assist me after I fell behind and encountered many problems with the beak. : / Not to say that I couldn't have done it at all, simply that I couldn't have done it while doing the extra work I had to do to fix the beak. It just wouldn't have been done in time.

This was by far the easiest, if a bit confusing item to make. I had no pattern and had to call in the mothership to remember to how do mathematics. If you can understand this diagram, congratulations! I had to before I was permitted to cut anything. XD

Basically the pattern calls for 6 of the same piece, cut out of black fabric and sewn together to form a poncho. (And then 6 more to make the lining) The idea here is that each side of the poncho is 270 degrees of a circle. That way, when I raise my arms, the poncho will not lift up in the middle.


 We drew out our main pattern piece on craft paper and cut it out. We made sure it was extra long, so I would have no problems after I cut it out. That bit at the top was originally intended to form the cowl neck as part of the poncho, but it didn't work out. Neither of us having made ponchos before, we were flying blind on this one...

 I sewed all 6 pieces of the top layer together and then did the exact same for the lining.


As you can see, it doesn't really look like anything other than a lump of fabric... 

I pinned the two ponchos together with right side facing each other and sewed the entire bottom together. This seam was merely to get the two pieces of fabric to behave so I could work with it in the next steps without having the fabric wrinkle (It would be cut off with the excess fabric later). It also ensured that all 6 seams of the lining would line up with the outer layer, which is important. Time consuming, but totally worth the pain.

I laid out the poncho (because that is essentially what it is--even if that doesn't sound at all sinister) on my table and was displeased to find that it was too big to lay out flat. So I had to extend the table with cardboard. 


 I cut out 5 basic feather shapes for the bottom that could be arranged to create different patterns for the bottom of the cloak. Much easier to trace these than to draw at random.


After pinning where I wanted the length to be while wearing it, I made sure it was an equal length all the way around (except for the back, which was longer to create a 'tail' of sorts) so it would resemble a circle. I marked how far down my arms I wanted the fabric to be for the sleeves also. The sleeves are built into the cloak by simply pinching the fabric together under the wrists, and modifying the shape of the edge to swoop up and into a rectangle.
Using my templates. Easy as pie. >:D 

After I drew out the entire outline, I set upon the lengthy task of sewing along my guidelines. I could draw on the fabric here, because when I turn it inside out, the pencil marks will be on the inside. :D And yes, I did make some errors despite saying it was easy.

Once that was done, I clipped off the excess fabric along the edges. And then tried it on. Pretty good right? Yeah, I know you can't see it, imagine how I felt working in such poor lighting!


The tights and shoes were picked up downtown. I figured since all the characters are ballet dancers, and are drawn to have ballet slippers, I should wear real ballet slippers as opposed to cheap black flats. I figured they would be more comfortable and flexible to wear. (And also I couldn't find cheap plain black flats anywhere!)

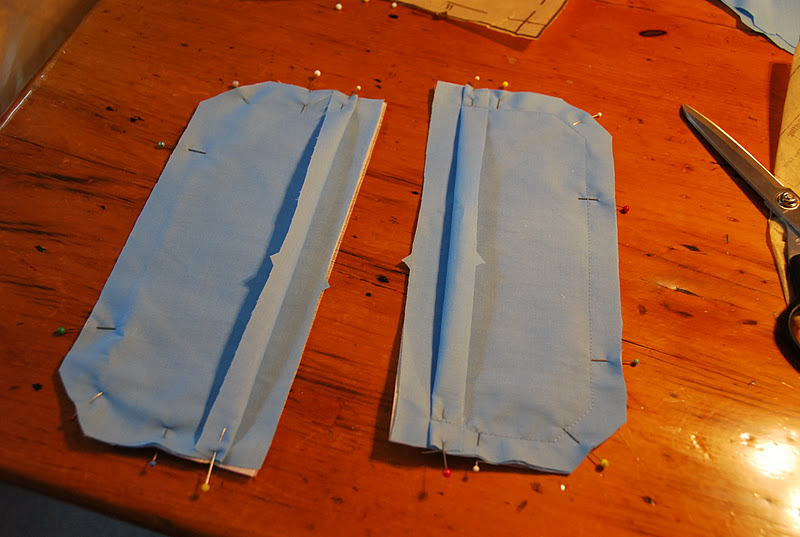
At this point, I had to call in the mothership to help me. Not that I couldn't do this task, but the beak was having the foam coat problem at this point and required my attention. I had my mum do the stress clipping at the corners so it would turn inside out nicely. Not hard just time consuming and tedious, but I still thank her imensely for her help. 


And look how nice it looks. <3 Thanks mum! :D 


Oh hey, where the heck did that cowl come from? Yeah, I didn't help at all with that part. Stupid foam coat... But I will tell you what she did:

Basically, we looked up pictures of cowl necks online (Look for the monks from 'The Name of the Rose', and you will get an idea) Basically we determined that a cowl neck was a large tube of fabric that would just slump down around your neck and form these great looking rumples. :D So mum made a tube that was rounded on both sides of the bottom so it would scoop down in the front and back, and then lined it. Super!
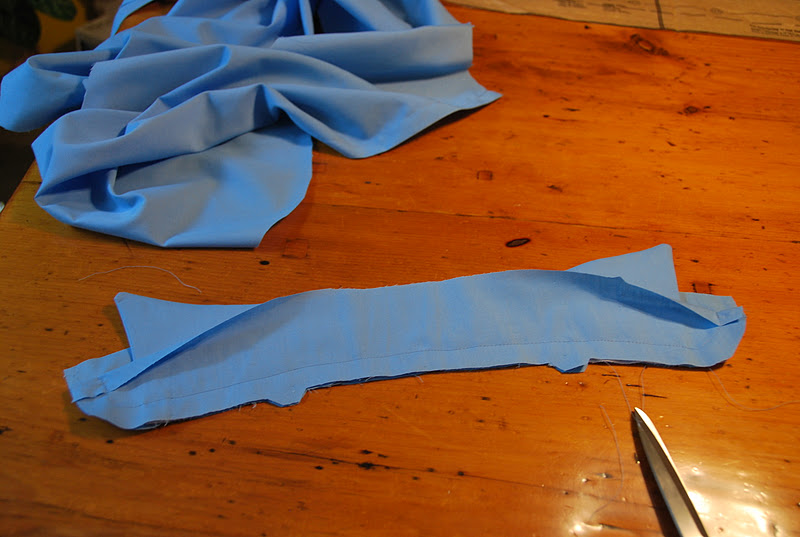
While she did that, I worked on adding the cuffs to the sleeves and then sewing on the dome fasteners that would hold it together.


Mum finished the neck on the poncho and then I sewed on the dome fasteners to hold the cowl in place. It wasn't my plan to make the cowl a separate piece, but I think it turned out a lot better than I had originally thought.

It's also very comfortable. :D I love this costume, and you will be seeing me wear it again at other cons. I want to go back and fix a few things, and I'd really like to make the sword that goes with this costume, but that might not be until next year, after I've had more experience with power tools at school.

I entered this costume in the Masquerade, but the competition was tough and I didn't win! More on that in later posts!