Showing posts with label 3D printing. Show all posts

Wednesday, September 30, 2015

Inkling - Guns and Tanks - Splatoon

Part 3 of the Splatoon Squad posts! Lets talk armaments! >:D If you are interested in the tentacle hats, go here! If you want to see how we put together the outfits, go here! Once again hats off to Elemental for the great shots from the photoshoot!

Now we delve into territory that I know little to nothing about: The Armaments. I had very little involvement in this area. I was a helping hand in the mass production line for the harnesses, ink pillows, and I helped put the electrical tape gauges on the side of the tanks. That's about it. Credit goes to the real masterminds Brian (Ragz Cosplay) and Adrien, and their very best shop gnome Andy (Yavarice).

Based on a 3D model that Andy did of the tank, Brian broke down and printed all the components. These had to be cleaned up (sanded) and painted, and then these were assembled into a full team of tanks. Andy gave a hand in this process.

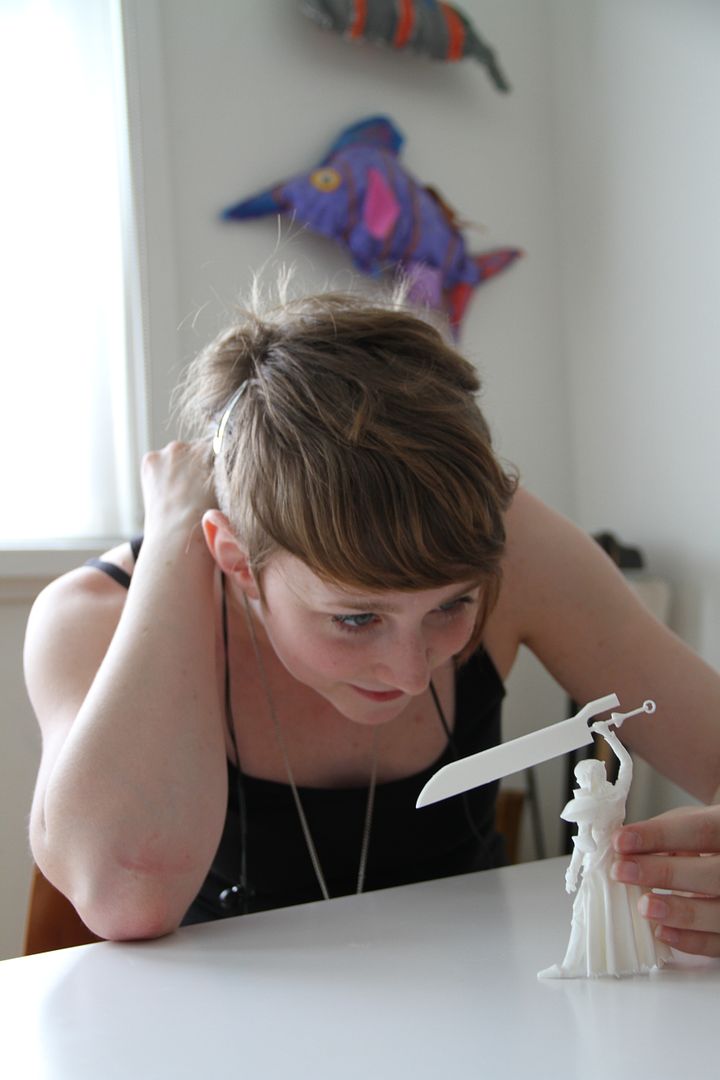
All I can tell you about 3D printers is that they operate by wizard magic. I am fairly certain Brian is a wizard, and Andy is a sorcerer's apprentice.

The pieces were painted up separately using spraypaints and then glued together using a glue called E6000. The bottom of the tank is removeable so that the ink pillow can be changed. By changing the ink pillow you can easily re-purpose the tank for a different colour team.

The pillows are made from the same spandex as our hats. Michelle (Mage Cosplay) and I made fabric cylinders of varying heights and stuffed them. The pattern is literally 2 circles and a rectangle. Except Brian's, he made the top of his wavy. Because he is not lazy like me.

The harness rigs are made out of foam mats from walmart, black webbing, buckles and hot glue. The shoulder straps are 2" wide and tapered at the front end. After being cut to the desired length, we put a slit at each end for the webbing to be fed through. The webbing had the female end of the buckle sewn on to one end. We carved out a small depression in the inside of the strap and glued this end of the buckle in place. The other end is the adjustable side. When we had the desired length, the excess webbing was cut off. We burned the ends with a lighter so they wouldn't fray.

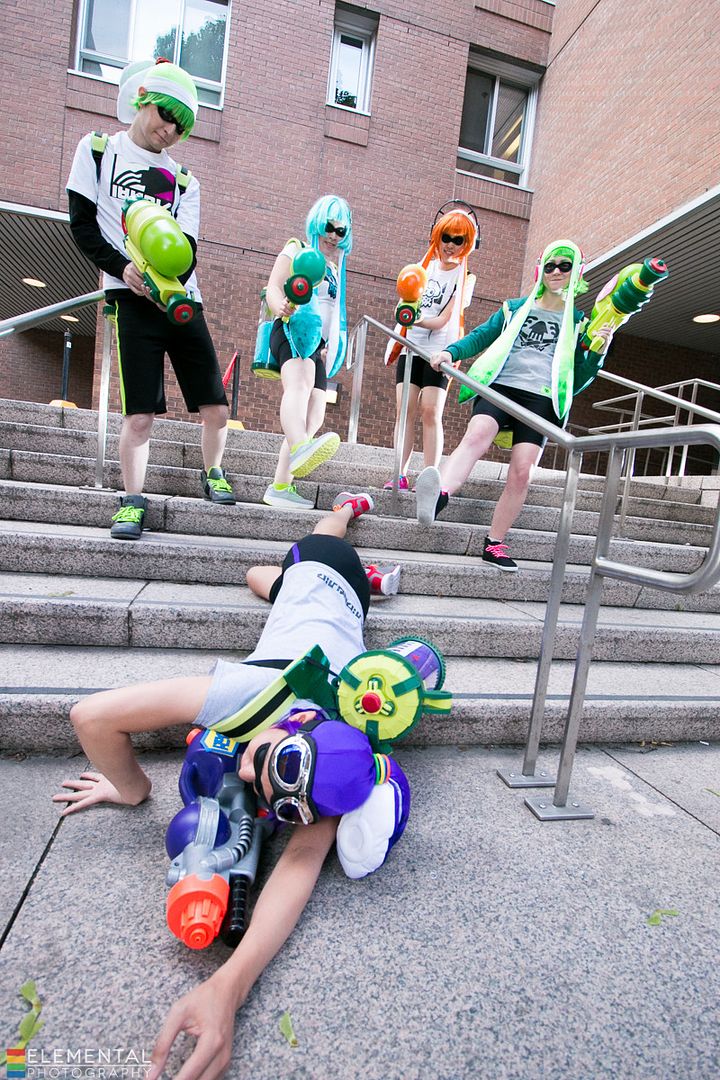
The two straps were glued to a back piece that is a dumbell shape that has a thinner webbing strap attached to it. This smaller straps has velcro and feeds through two slots on the tank. They make the tank removable from the harness. You can see where the tank attaches to the harness in this great shot of us beating up Andy.


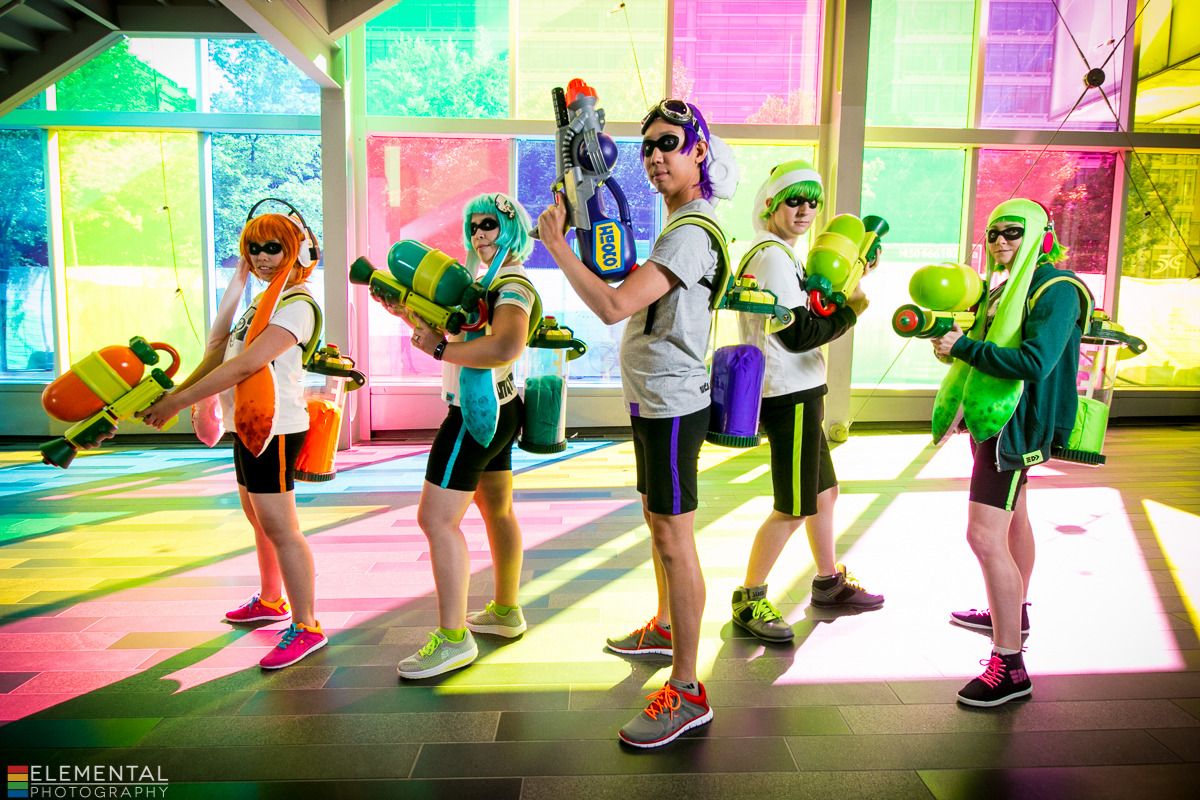
As for the Splattershots, Adrien takes all the credit there. (Well, Andy does get some credit for being his resident shop gnome and doing much grunt work cutting out pieces.) Adrien created some foam pieces as templates and vaccuformed all the separate pieces over them. These were then cut out and glued together. But I assure you it is more complicated than I have described. I am still in awe of these, they are so professionally made!

I believe Andy's gun is a Nerf gun? With a logo added to make it look super legit. The logos were made from craft foam.

Overall I was really impressed how we were able to pull together a really cohesive looking group! I hope I get to take part in something like this again in the future. Special thanks goes to everyone who helped make this happen. I'm excited for Squids 2.0! :D

Tuesday, June 10, 2014

3D Printing Collaboration with Crowtrees Studio

Hey all! This is something I've been excited to share for a while! A couple of months ago I collaborated with Crowtrees Studio to create a miniature 3D figure of my Asuna costume.

I say "collaboration" in the loosest sense of the word because all I really had to do was get in costume hold a pose for about 10 minutes! Hahaha :D Special thanks to James and Rui for making this happen! And another thanks goes to my friend Harriet for coming with me and acting as my squire for the day!

This project has been a long time in the running; I was actually contacted before Christmas about potentially being a cosplay model for 3D scanning. We set up a date in March to do the scans. I took 3 costumes with me that weekend: Asuna, Alice, and Kero. We did 5 scans that day (2 Asuna, 2 Alice, 1 Kero), but Asuna is the one they went ahead with to create the final 3D model.
Though they are now starting into doing cosplay figures, Crowtrees actually started out doing wedding cake toppers!

The thing about cosplay is that you encounter a whole lot of crazy challenges in the scanning process because of all the different complicated bits. For example, on Asuna the golden bells on her hair didn't get picked up by the scanners at all because they are highly reflective! Those had to be added in in post. Similarly when we scanned Kero's candy the cellophane wrapping totally messed with the scan. Another issue on Asuna was getting the back of the legs to scan, so we had to do a second pass with the scanner of just the legs while the skirt was held out of the way.

In terms of pose, I had jokingly mentioned that my one issue with this costume was that the sword was too heavy to wield and was very limiting on my posing capabilities. When they told me they could scan the sword separately and add it in later I was thrilled! Finally I would get to hold the sword in the air! Hahaha So they rigged a pole to be stationary above my head that I could hold onto at the right angle so they could scan my body with my arm raised. (Because if I just held my arm in the air it would move around a lot during the scan!) Long story short, I finally got my wish to hold the sword above my head like the character does in the manga. :P
I went to pick up my mini me last week! What a surreal experience! It is one thing to see a figurine of the same character as you, it is another thing to see a miniature version of your costume!

I am always really impressed with technology, so suffice to say that 3D scanning blew my mind! You could see the image forming in real time as the sensors picked up the figure with a surprising level of detail. The scans also picked up colour data as well! I especially love the way it picked up the drape of the fabric. :D

They printed it in 2 pieces, so the sword hand is detachable. Mini sword is much lighter and easier to deal with than the 6' version! Hahaha
Overall this was a really fun project to be involved with! I totally love my figurine! Really glad I got this opportunity. :)

Excited to see what these guys do in the future as the technology gets even better! :D

Tuesday, April 8, 2014

April Update

Hey all! This month is turning out to be crazy! So many projects, so little time.

Madly at work finishing my projects for school, while simultaneously working on my original costume (Elven Archer) for Costume-Con, which is coming up at the end of this month. Fingers crossed that I will manage to get everything done! Right following Costume-Con I will be barreling straight into prep for Anime North, so look forward to that. Once again, I encourage you to become a facebook fan if you want to see cool progress as it happens.

Recently I have done 2 tutorial style posts, specifically looking at one aspect of a costume piece and how to put it together (namely my Piping Trim Tutorial and my Busk Closure Tutorial). Fact: I actually started this blog in part for my own benefit, writing down how I made things/how I did stuff so I could look back and have everything documented. This way I could use it for reference later when I wanted to do something similar, and even if I forgot how to do something I would have no issue looking it up later. Wondering if you guys like these and if there were any specific simple tutorials that people would be interested in seeing in the future? (Like zippers, hook and eye tape, etc.)

Last month I did a collaboration with Crowtrees Studio! It involves 3D printing and cosplay! :) I won't go into too much detail now (saving that for a later post), but I had 3 costumes scanned to be printed in miniature. They are still in progress cleaning up the 3D scans, but I am very excited to see the finished product. Below is a preview of one of the models!

That's all for now!

Tuesday, March 11, 2014

March Update

Hey all! I am quickly running out of new material as the end of term and the beginning of con season now approaches. Pictures of my first corset will be up later this month (as it was just returned from my prof today), so look forward to that! :) No tutorial on that project, as I have very few progress pictures and the process was so complex that I don't really feel I could easily write how I did it considering it was my first time making one. Hoping to fix up Presea's axe in time for a spring photoshoot, so I can finish posting that costume.

In the meantime I am madly working on some very labour intensive projects for school that you will get to see around the beginning of April. Currently working on my second corset, a tailored wool coat and a night table. Unfortunately my original design elf costume has stuttered to a halt, but I am hoping to resume that shortly... time will tell whether or not it will be done for CostumeCon...

This past weekend I was involved in a collaboration that I will talk more about in April. I won't give too much away, but I will say it involves 3D printing and some really cool technology!

That's all for now! ;D