Showing posts with label felt. Show all posts

Friday, August 19, 2016

Brown Cloche Hat With Feathers


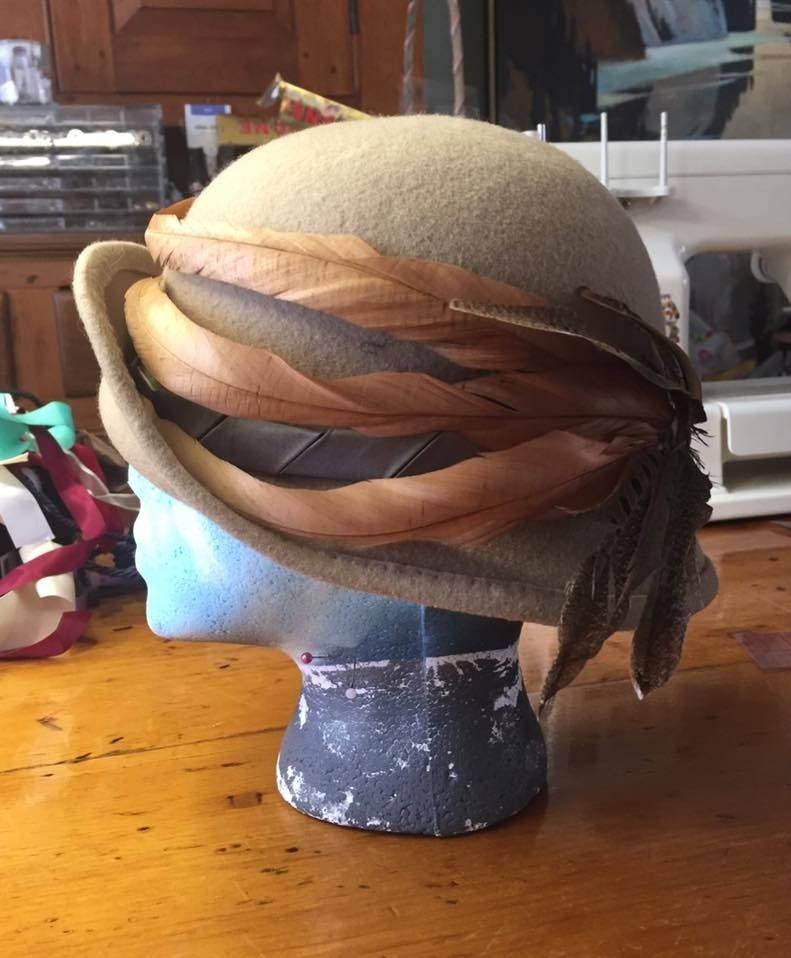
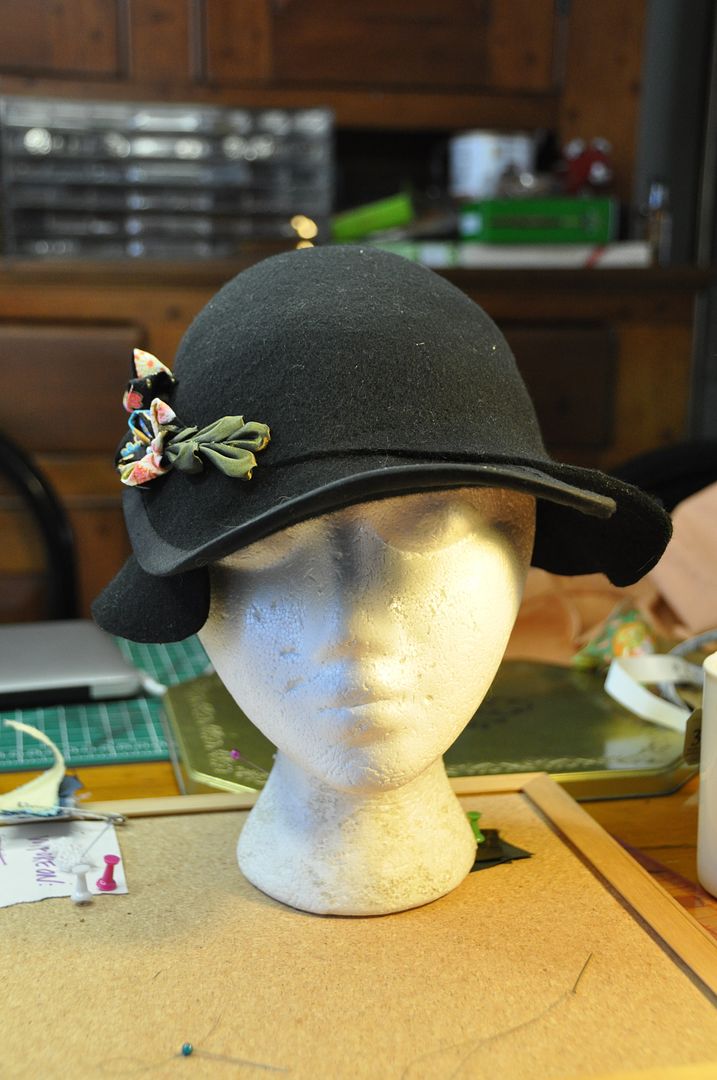
Let's take a look at my final millinery project: a blocked felt hat! I decided to do a simple cloche hat decorated with feathers. 
To make a blocked felt hat, you buy a "hood" or "capeline" which is 100% wool. (Or you can buy an 100% wool hat that has already been shaped and reshape it. You can get them at H&M.) 

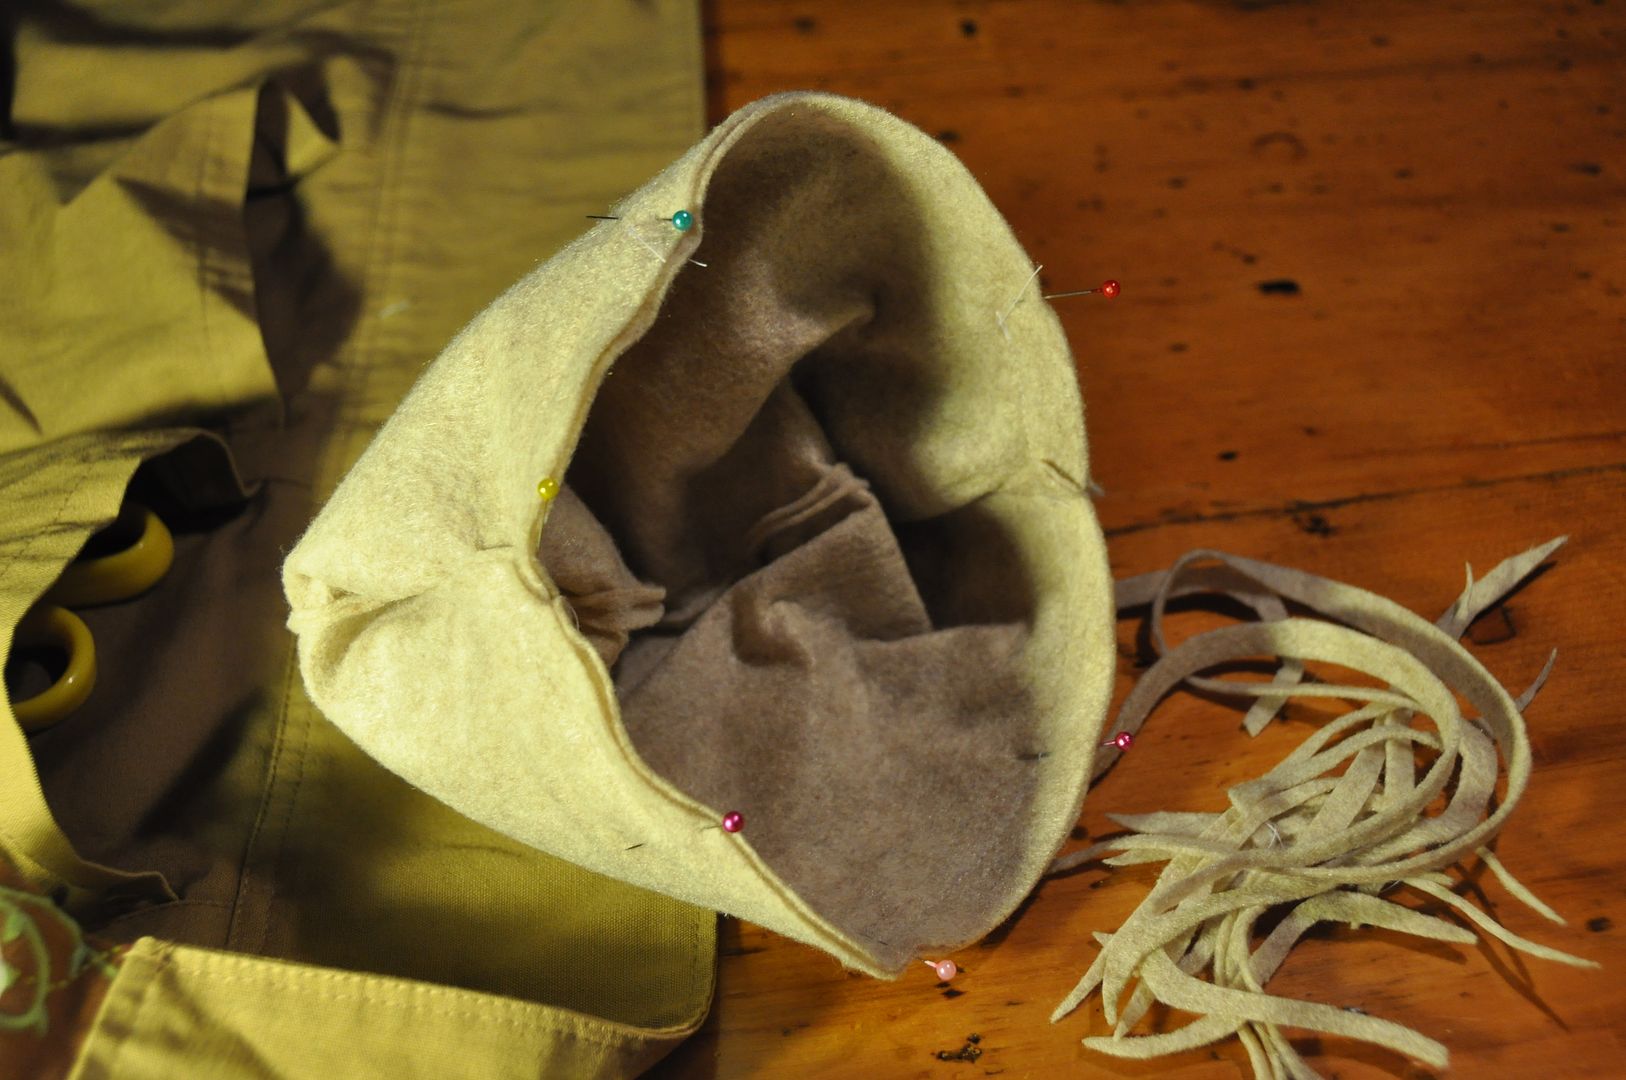
You heat up a tea kettle that doesn't have an automatic shut off (so it will keep boiling--just make sure it doesn't run out of water, because you need the steam and to not set anything on fire). You place the hood/capeline over the steam spout and let it steam. It should have condensation on the outside and it will be really hot when it is ready for shaping. Use tongs to take the hood/capeline off the steam and place it over your desired block. I used a round crown top. Then you stretch it over the block, tie it tight and pin it in place. Let it dry for 24 hours. 

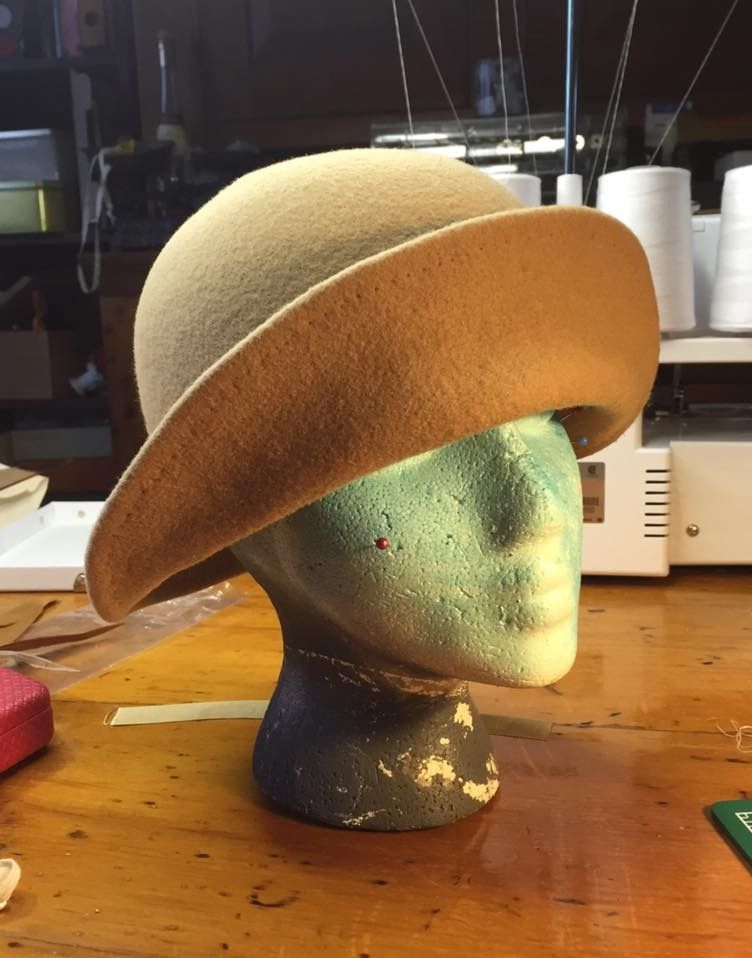
For my cloche, the crown and brim are all one piece. I was pressed for time with moving and was going to miss the last class, so doing a one piece hat was necessary--but also, I really like this style anyway.

If I were to do a separate blocked brim, at this point I would have carefully cut off the brim with an exacto-knife and blocked it on a brim block. For a one piece hat, I applied more steam and shaped the brim while the crown was still tied down on the block. I used rolled up pieces of fabric to shape around and let it sit while it dried. During this time I trimmed off some of the excess felt  from the brim to get it closer to the finished shape that I wanted.

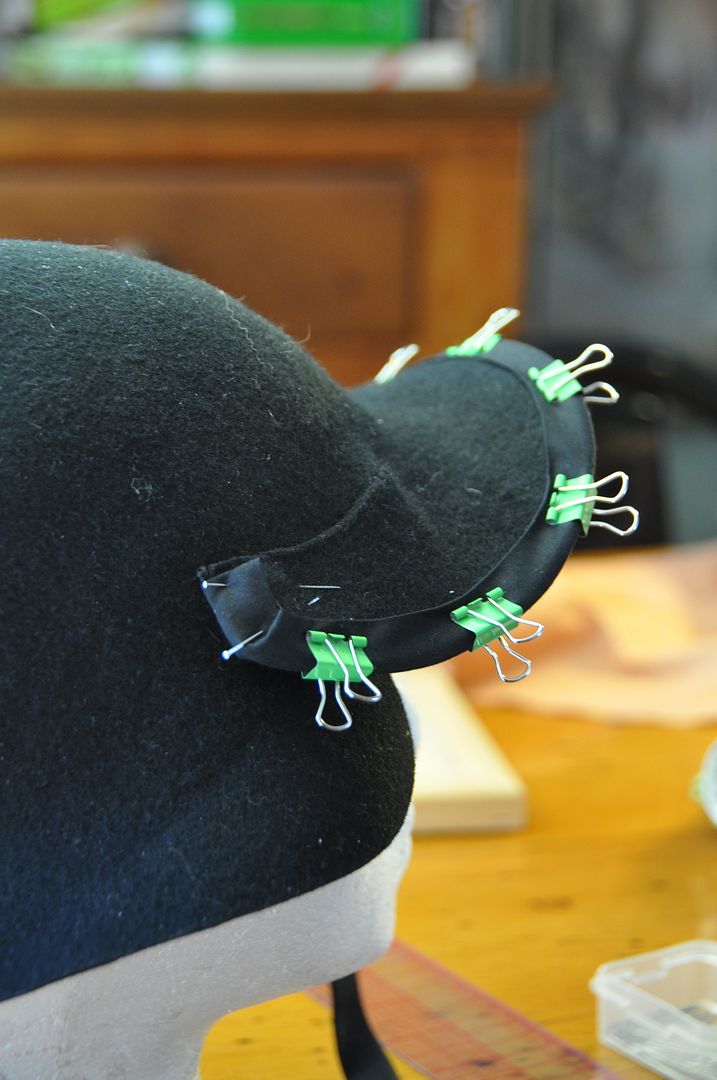
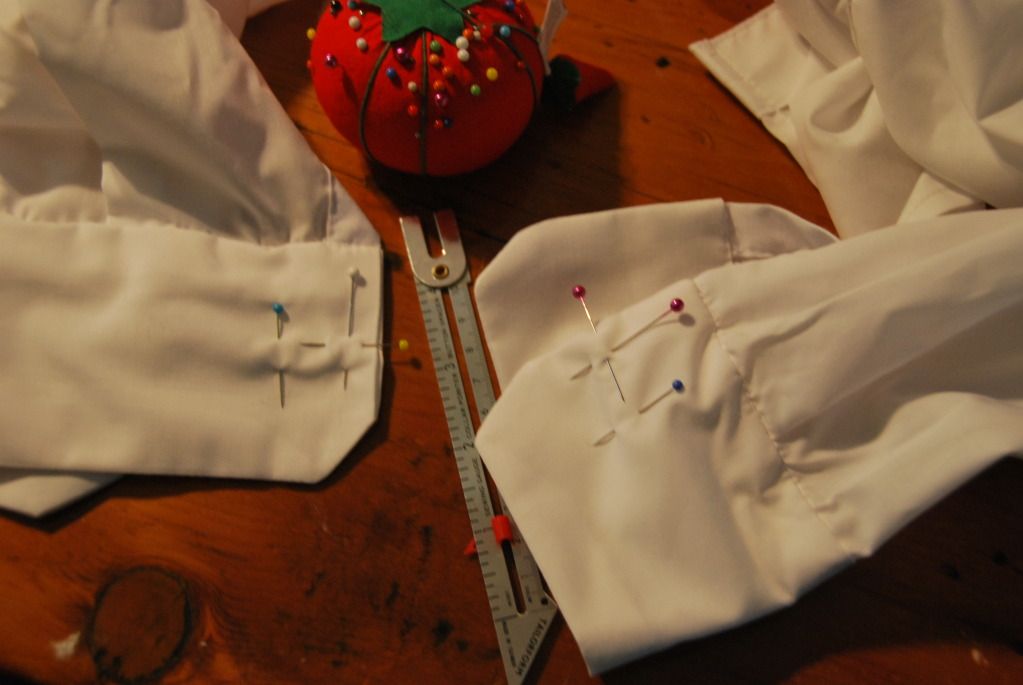
When it was dry, I removed it from the block and set about finishing the edge of the brim. I decided to do a simple folded edge finish. I marked my finished edge and carefully trimmed the brim, leaving a 1/2" fold allowance. I folded it over, using bulldog clips to hold it in place so I could baste it. Then I carefully ironed it before stitching it as invisibly as possible. I ironed it again after stitching. This helped to give it a crisper edge.

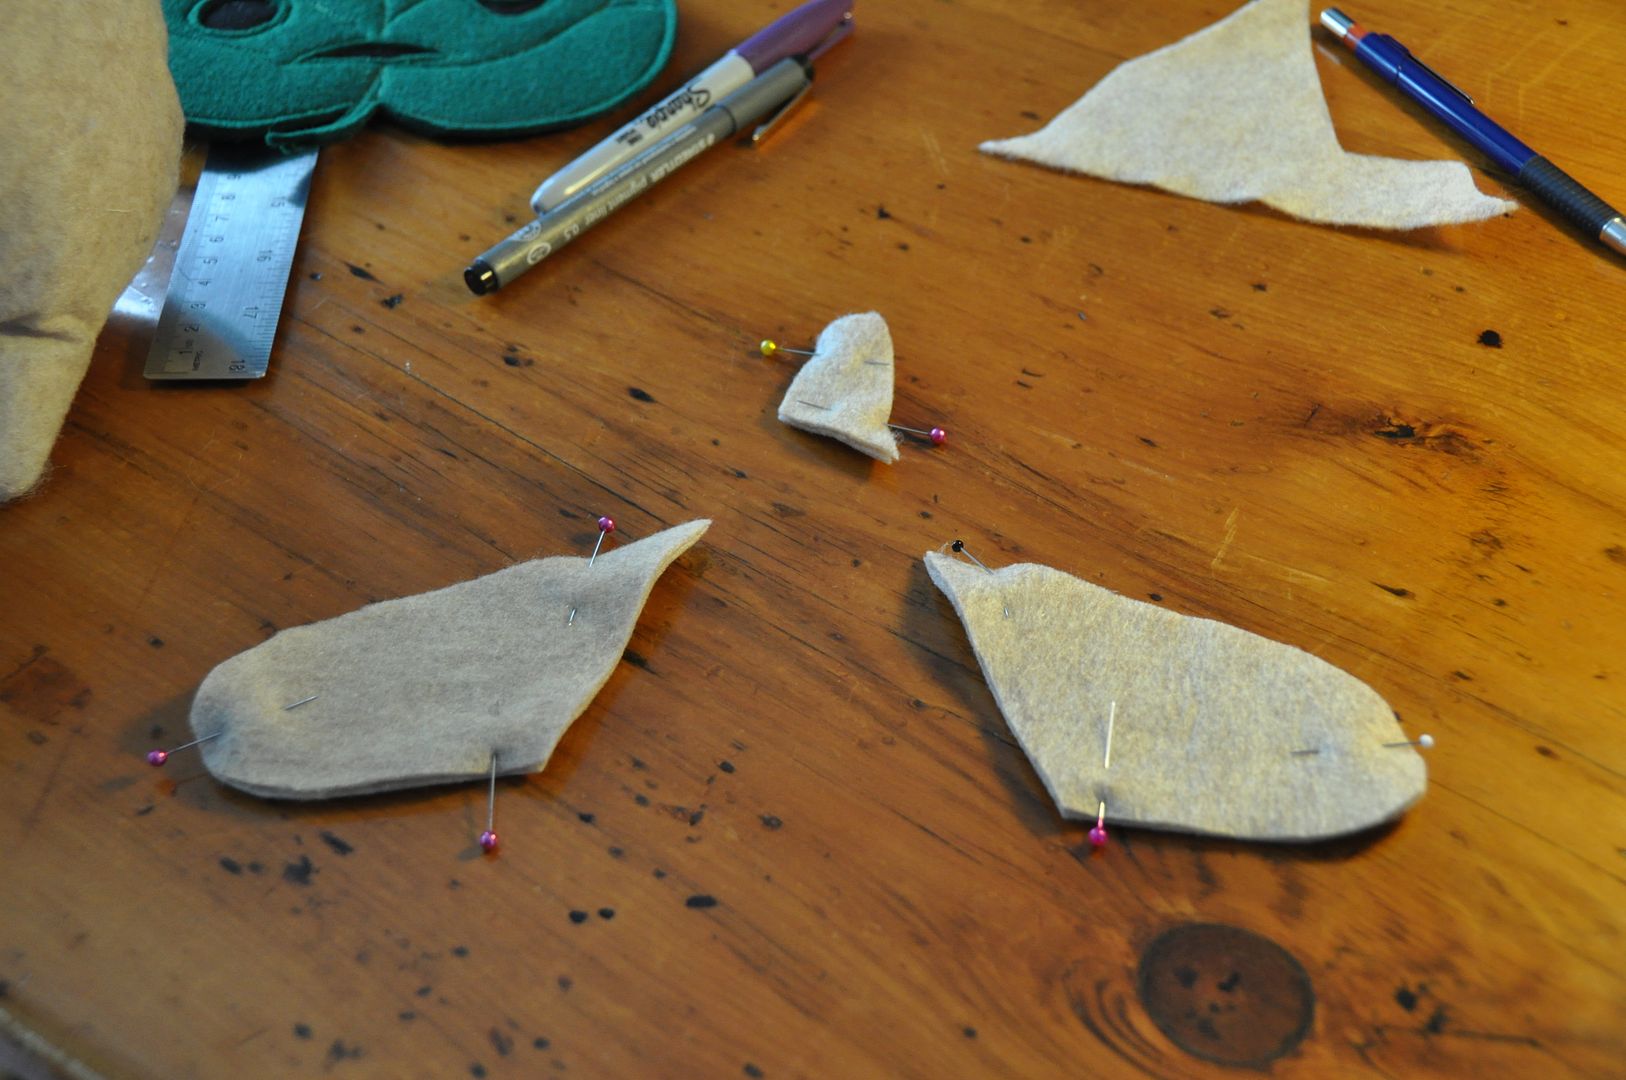
Next I added the decorations and headband to the inside. I also gave it a label. I decided to accent it with more of that green silk I bought for the previous hat and feathers left over from my Forest Guardian costume. The goal is to stitch decorations on securely without making them look heavily stitched on,

I'm not too impressed with how the decorations turned out--specifically the feathers. I may replace them later. But I really love this shape--simple, yet elegant!


I've signed up for Millinery Part 2! So look forward to more hats, coming this fall! :D

Wednesday, May 18, 2016

White Rabbit - Wire Frame Mini Tophat

The second project from my millinery class--my White Rabbit top hat!

So the project outline was really open-ended: you had to make a wire frame hat, cover it with sheer fabric and decorate it to represent a theme/character. We were given the option of doing a mini top hat or boater that she had patterns for, or we could design our own hat shape. I picked the mini top hat because I didn't have time to pattern a new shape.

After going fabric shopping to get ideas, I found this really cool sheer blue-grey fabric. It had almost a paper-like quality to it. I thought it might make an interesting take on the White Rabbit. Since I have learned from theatre--stage lights wash out fabrics and make them look whiter, perhaps I could design a white rabbit while hardly using any white?
Here's a picture of the finished hat frame on top of the fabric. It shifts from blue to grey depending on lighting and instagram filters. Haha

I won't go into too much detail on how the frame was constructed. All the pieces of wire were carefully cut to length and bent into shape. I used quilting thread to tightly wrap the joints and then strengthened the bond with a mixture of white glue and water.

The brim and crown were not attached until after I covered it. It makes covering the pieces way easier.
I covered the crown and brim using 2 layers of my fabric. It was fairly sheer with just a single layer and I was worried it would rip. I like that with the double layer you get a ghost of the leaf pattern coming through.

For the crown I cut 2 circles overlayed, I draped these over the top holding them in place with pins. Then I pleated the fabric along the bottom edge to conform it to the shape of the crown. I basted this in place, attaching it to the frame. I cut off some of the excess fabric, but the rest would be tucked into the inside.

The brim was done in a similar way. I cut 2 long rectangles that measured the same as the outer circumference of the brim. These were each sewn into a long loop and folded in half over the edge. Then I pleated and basted them to the frame.
Next I created my ear shape. As you can see here, both ears are made out of one piece of wire. It would sit between the crown and brim and make them much stronger overall. I covered them with a white silk leftover from the painting and dye class I took last summer.

All of my cool accent pieces--laser cut clock, clock hands--were picked up from Michael's art store. It has a great selection of weird crafting bits. I got the clock hands in the DIY clock section, for example.

The gold fabric I used to make a hat band was leftover from my Steampunk Corset (I really did buy way too much fabric for that).
I sewed the ears to the brim base, then sewed my brim to the crown. Then I carefully tacked the side of the ears to the top of the top hat--I sewed the wire frame to the wire frame, not just the fabrics.

Next was the hat band and decoration. I sewed the hat band on, the sewed the decorations on. Before attaching the clock hands I sponged on some gold acrylic paint and sprayed them with a gloss finish sealer. This was to help them match the costume better.

Lastly, I sewed a felt circle to the bottom to cover the hole and seal it shut. Then I sewed a headband to it (which I also painted gold). I think later I will swap out the headband for alligator clips, but for now (and for handing it it) it was fine.

I'm really happy with how the hat turned out and I am in the process of completing a full design for the costume. I'm thinking I would really like to complete the outfit in the future...

Thursday, May 14, 2015

Hooped Embroidery Ornament

Just something I made for my sister as a birthday gift! She loves goats, so I made her a cute goat. I think he is considering the flower a tasty snack. Pretty cute right? I got to look up lots of reference pictures of adorable goats for this project.

This DIY project brought up fond memories of building the Forest Guardian costume, but with less pressure. I would like to do embroidery more often if I could.


I embroidered using embroidery floss on muslin reinforced with non-fusible interfacing. I trimmed off the excess fabric.

Making sure the screw was at the top, to hang it from later, I glued the fabric in place and tightened it. My glue of choice was Weldbond. I used a smaller bowl to hold the fabric in place while the glue dried.
Lastly I cut a circle of red felt to protect the back. This I glued onto the back. Then I just tied a string to hang it from! Easy!

Friday, May 1, 2015

Cloche Hat with Kanzashi

Today is a short entry about a project I did for school! The goal was to change the shape of an existing felt hat using steam, and decorate it. I created a 1920s inspired cloche hat that I decorated with kanzashi flowers. Pretty cute right? ;D

For doing this it is very important that the hat is 100% wool, otherwise it won't really work. I found this nondescript black hat at H&M for about $25.

I cut off most of the brim, and from the cutaways I created the second brim layer. Using a tea kettle I let the hat steam and continued to stretch it by hand and over a metal bowl to change the shape. I did this until I was happy with it/the crease was gone. Then I hand stitched brim #2 on, then I wired the edge.  I finished the inside with a gros grain ribbon. This is so the hat wouldn't stretch later.

Once that was done I began to create the decorations. I found this great tutorial on making kanzashi flowers--Japanese style folded flowers. Using the same method I folded the leaves as well. It's basically like origami for fabric.

I finished the edge of the hat with a bias tape I had in my scrap bin.

I finished them by adding a couple of beads to the center, then I sewed them to the hat. I had a lot of fun making them and they turned out pretty great. I got the fabric when I was in Tokyo this past winter.

Then I had a cute hat to hand in! And to wear later! ;D

Tuesday, July 22, 2014

Atomic Lollipop 2014


I surprised myself and impulsively decided to attend Atomic Lollipop at the last minute last Saturday! I went with my sister Elanne (aka SweetBoake) and we had a total blast! APop was a very different, very casual con environment that was completely opposite of what I am used to. But it was certainly a nice change. :) It was also nice to see the Science Center, which I hadn't been to in like 10 years!

I wore my Toothless kigurumi to the event (and only overheated a little bit). Lots of people asked me where I bought it, and I'm sorry to say I made it myself. :P (I think I disappointed at least 15 different people.) An in-depth look at how I made that is coming up sometime in August. (Though if anyone is interested in commissioning me to make another one this summer... just send me an email! ;D )
I think what impressed me the most about Apop was the amount of really crazy events and crafts that were offered! My sister and I attended a few crafting session, explored the Science Center and even played a few video games. :)

It was nice to see a few of my cosplay friends for a short time! Looking forward to seeing them at the next event. (Though knowing me that will be AN next year... hahaha)

Overall I really enjoyed APop and I will definitely be going again next year, even if it's only for one day! :)

Wednesday, February 19, 2014

Makar Plushie - Legend of Zelda: Wind Waker

This is a plushie I made for my sister's birthday gift. Yes, it's Makar, and yes, Makar is adorable. He was pretty easy to make, and turned out as well as I'd hoped. :D

This plushie is made out of felt, which was a very different material for me to work with. It's always good to experiment with different fabrics. The beige felt I chose for this project is sort of mottled in colour, which suits the character well. (He is supposed to be a tree sprout thing.)

For those of you unfamiliar with the character, Makar is from the video game Wind Waker in the Legend of Zelda series. He is a Korok from the Forest Haven. My sister is a big fan of the game, and Makar is her favourite character. Probably because he is adorable.
First I patterned the body. The two halves are different at the top. I started by making a mockup in muslin. This was a good idea, because this is my first time patterning a plushie, and so it looked a bit wonky.

The curve I originally had on the front and back seam of the body was too extreme, so I pinned and took it in on the mockup. You can see the change I made in red on the pattern pieces to reflect the change on the mockup.
Once I was satisfied with my mockup I started on the final version.

I cut 2 pieces for each half (one for the front, one for the back). I sewed the side seams together, clipped the excess fabric on the inside so it would be easier to turn right way out.

Leaving one right way out, and one inside out I lined up the center seams and sewed them together. I left a gap to turn it right way out and stuff it. This gap was left where it would be covered by the leaf face.
After sufficiently stuffing it--ensuring the stuffing got into all the extremities--I hand-stitched up the center seam.

I made a pattern piece for the face. I cut 2 in green felt and one smaller piece in black fabric. I cut the holes out of the top piece of felt only, the black fabric in between the layers made the facial expression stand out rather nicely.
First I stitched around the outside of the face, then outlined all the facial features. Then in a lighter green thread I stitched the vein pattern onto the leaf.

Then I made some arms and a little twig. These were stitched together leaving one end open, seam allowance clipped, and then flipped right way out. I stuffed them and hand stitched them onto the body.

Lastly I tacked down the leaf face with a secure hand stitch.

The result was one cute plushie!

Tuesday, October 2, 2012

Cosmo - Blouse & Wings - Fairly Odd Parents

Here's our first look at my Cosmo costume! This costume debuted at Otakuthon this past summer in Montreal. I also wore it to Fanexpo. :D

As a kid, I loved the show Fairly Odd Parents, and of course my favourite character was the ever wacky Cosmo. ;D Such a ridiculous character, it reminds me of the hunt! Haha!

I've seen this costume done before, but I've never seen it done well, so I made it my mission to do Cosmo justice.

Once again Mike did a fantastic photoshoot with me. This one was at the cool pink installation at the Palais du Congres. It's Wanda's colour. ;D Go here to check out the full photoshoot! I obviously take no credit for these fabulous pictures. :P

I based this shirt off the blouse pattern I used for my 10th Doctor costume. (If you want a more detailed look at how to make a blouse, you should check that one out.) My main goal behind this part of the costume is that I wanted the wings to stick out of the shirt, not be worn on top of it, but still be removable so they could be washed.

My solution here was 2 slits in the back that the wings would stick through. I decided that the wings would be 4" apart. Then I modified the pattern so that the back of the shirt was made of three panels, one a rectangle that was 4" apart between the seams. With this in place, I could finish the shirt and re-open the seams later.
I sewed up the shoulder seams, finished those, as well as a top of the two back-slit seams.

Then I attached the collar.
Beautiful! I almost considered leaving the shirt like that~!

Just kidding.

I sewed up the side seams, attached the sleeves and cuffs. Then I measured, put the button holes in, and sewed on the buttons.

At this point I also made some adjustments to the fit of the blouse at the back. Taking it in a bit at the back seams so it wasn't so wide at the lower back.
Then I started on the wing rig. I originally attempted to do wings made out of tights stretched over a wire frame, but the elasticity in the tights was too strong, and the wire was bending under the pressure.

Instead I decided to scrap that and make them out of felt. I cut 4 pieces of felt to the shape I wanted and then sewed the pairs together. I took a piece of wire that was still attached to the coil and stuck it in to the first wing, pushing it to the very outer edge. Then I sewed around the wire to keep it in place.
Then I measured and marked 4" from the base of the wing on the wire where the base of the second wing would be. (Making sure it was the right way up.) I repeated the process with the second wing. After clipping off the excess wire and joining the 2 loose ends together (making sure the wings sat 4" apart both at the top and bottom of the base) I sewed a rectangular cover over the wire frame where it would be touching my skin. This was to help keep the correct shape, have a surface to attach the straps to, and protect my back from the edges of the wires.
Using my dress form, I figured out where I wanted the wings on my back. Once I figured out the placement I made and attached the straps, which I made out of elastic. I made sure they were tight enough so the rig would sit as flush to my back as possible without cutting off the circulation to my arms.

I re-opened the back seams where I wanted the wings to be. Then I finished off the holes, making sure they were long enough to fit the wings through. I carefully stitched in some white hook & eye tape, making sure that the hooks would not bump into the wires where the wings poke out.
The hook & eye tape closes up the gap under and around the wings.
This is a clean way of having wings, without having the straps and rig fully visible over your costume.
Lastly I finished the cuffs of the shirt by adding buttons. ;D And then it was done!

I think that making the wings both detachable and not over the costume was a small detail that made a big difference for this costume.