Showing posts with label sewing. Show all posts

Wednesday, March 22, 2017

Leia Rebel Scout - Star Wars IV - Poncho

The second part of my Leia costume--let's talk about the poncho! I think this poncho is probably what makes this costume somehow so cool and so dorky all at the same time. I really love the neat cowl neck hood and the free flowing back as design elements. This is perhaps the most underrated Leia costume there is.

I hope to do a photoshoot of this later this spring out in the woods somewhere. For now you will have to settle for crappy mirror pics, as I don't even have convention photos of this costume yet...

To see how I styled the wig, go here!


After patterning and mocking it up, I then cut out the pieces in the real fabric and laid them out. I used watered down fabric paints and splattered and sponged on some different tones in mixed greens and browns. I actually really like how the camo pattern turned out.

You can see below the difference between when it was wet and when it dried.

My one difficulty here was that my brown paint had expired and I was stuck in the middle of nowhere. The paint kept separating and actually added some extra unintentional texture.

Right you can see the hood pieces laid flat. The hood is made of 4 "C" shapes that make up the outer rim, 2 rectangles (not pictured) that form the centre top of the hood and that one super weird piece the forms the sides of the hood and wraps around the front of the collar. The goal was to not have a seam up the front of the hood because there isn't one in any of my reference pictures. I think I managed to recreate it pretty accurately.

After everything dried, I ironed it to set the fabric paint and then sewed it together. 

The actual construction was super straight-forward--and unfortunately I didn't document it. 

I faced the side edges of the poncho and hemmed the front and back. The hood was first pieced together and then attached to the poncho neck hole. 

Some pictures of the finished poncho. 

The last step was to add the holes for the belt. Which secures the poncho in the front only. I faced and reinforced the hole. The process was similar to starting a welt pocket. 

Wednesday, January 11, 2017

Koi Fish Fascinator

The first of my hat projects from my millinery course from this past fall--a straw fascinator! The goal was to take a straw capeline and freeform pin and block it into an abstract shape. I decided to make a fish?

It's not the type of work I would normally do. I'm a person who tends to plan out what I'm doing in advance. So taking on a project where you had to make up what you were doing on the fly was a bit of a challenge for me.

The basics of blocking straw is: you take the straw capeline and wet it with a watered down gelatin mixture. This will make it easy to sculpt and pin. Then you let it dry in that shape. The gelatin acts as a stiffener.

I don't have any pictures of this part of the process because I didn't want to get gelatin on my phone. Haha

The challenge with mine is that I didn't want to do a large fascinator, and only wanted to use half of the capeline. But you can't just cut a straw capeline, otherwise the weave will quickly start to unravel. Before you cut it, you must first do a zig-zag stitch on either side of your cutting line--so the part you want to keep and the excess both don't unravel. I had to do this before I sprayed it with the gelatin mixture so I didn't get that on my sewing machine.

The "head" of the fish is half the crown of the capeline.

I just blocked it on a regular foam wig head. I used pins and bulldog clips to hold it in place as it dried.

Once it had dried overnight I carefully hand-stitched it to a plain black headband.

As an afterthought, I added little fins. These were made out of some of the excess material. They are hand stitched on.

Overall I think it was a neat exercise and a cool project, but I will probably never wear it.


Tuesday, October 25, 2016

Taking Orders for Splatoon Commissions!

Taking orders for Splatoon hats and tentacles!

- 30$ for full "boy" hats 
- 25$ for just the "girl" tentacles

All are made of spandex and hand painted. Team colour on request!

**Shipping is extra, determined by location

***All squid headgear must be sewn down to a wig in order to stay on (including boy hats). This is not included.

Shoot me a facebook message if you're interested!

Photo credit to Elemental Photography!


Thursday, October 13, 2016

Presea - Accessories - Tales of Symphonia

Welcome to Presea Part 4: Accessories! Feel free to venture back and check out the Gloves & Boots, Dress, and Wig. Many thanks to the ever fabulous Elemental for the amazing photos! We braved the cold and pulled it off!

This costume had a lot of smaller pieces involved. This post covers the belt, pouch, dagger, and Exsphere (necklace).

For this project I actually bought a piece of real leather to work with. I used the suede-like side as the outside (as opposed to the shiny side), because I thought it was more true to the character.

The first piece I cut was the long strip for the belt. Later I went back and reinforced this strip by sewing a second layer to it. I used scissors and carefully cut out the holes. The buckle was found in an store on Queen street after much searching.

Then I patterned the pouch.
The pouch consists of one curvy strip of leather that folds over on itself to be the front, bottom, back and flap of the pouch.
Then there are the 2 panels that form the two orange curved sides of the bag.


These were stitched together, then all the edges were finished.

These were then marked and very carefully hand stitched to the leather. At this time I was unsure if my sewing machine could handle leather, so I hand stitched all the leather on this costume. Turns out it can, with the right needle, which I found 1 year later when I returned to finish the project. Unfortunately I finished all the leather work before then...
I made a matching bias tape and stitched that on as well. The last step was to cut 2 slits in the back so the belt could be fed through the pouch.

I had intended for this bag to be functional, but unfortunately it was too floppy to hold it's shape with anything inside...
Next up is the dagger! The dagger is also attached to the belt, but the character never uses it, it seems purely part of the design.

I made the dagger out of wood, cutting it out with a jigsaw.

I had my friend Ian dremel out the blade edges because at the time the sanding bit on my dremel was not working. When I received it back I hand sanded it even smoother.
I created a sheath and loop to attach to the belt. The loop was on an angle so the dagger would be angled like it is on the character.

I started the paint treatment with grey primer, then silver and finally a light blue acrylic for the face of the blade.

The last detail was the Exsphere. I started by drawing out the piece full scale, then making a wire frame for it. I bought a large red bead for the gem in the center. I sculpted the piece with apoxie sculpt, which is great for this kind of thing as it dries super solid. Later I went back and broke the two side arms and bent them further back to better contour the neck. I filled in any divots with more apoxie sculpt and sanded it smooth.
 

I masked off the gem with painter's tape and then sprayed the piece a matte black. Then I painted over that with a gold acrylic paint. Lastly I created a short chain so it could be worn. The actual character has this gold piece built around the gem, which is fused into her skin, I didn't think that was necessary for me! Hahaha I just had to be careful not to look down suddenly, otherwise I would be jabbed in the neck.

Monday, September 19, 2016

Presea - Boots, Gloves & Armour - Tales of Symphonia

Salutations! After years on the shelf, I would like to continue to take a look at how I made my Presea costume! Look here for a blast from the past: how I made the Dress and 
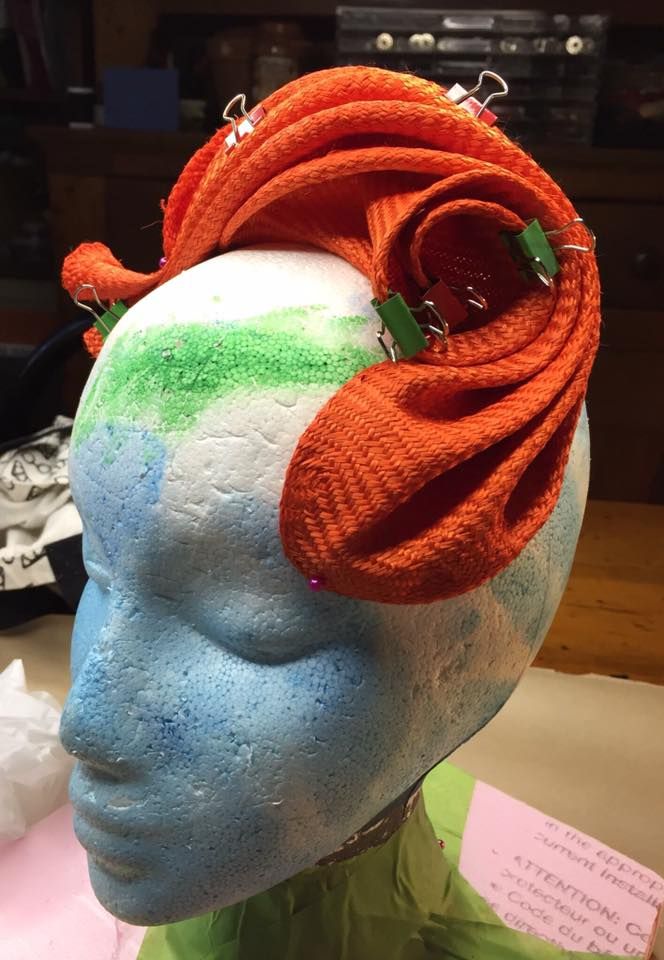
Wig! Seriously, I was posting about this in 2013 what-the-heckaroonie.

Getting this costume photoshoot worthy and documented is one of my 2016 goals and I'm pleased to say that with the costume and photoshoot done I can now finish documenting how I made it. From the depths of my computer hard-drive I have salvaged ye ancient progress photos.

Possibly the most challenging part of this costume and the main reason I put this costume on hiatus for a whole year (the other reason being my dog ate the tip off my battleaxe). This was my first time making boots, gloves and armour, and to be honest I had no idea what I was doing! I didn't get very far before I gave up. When I came back to this project a year later it was after I had done the armour for my Asuna costume and had much more sewing/patterning experience.

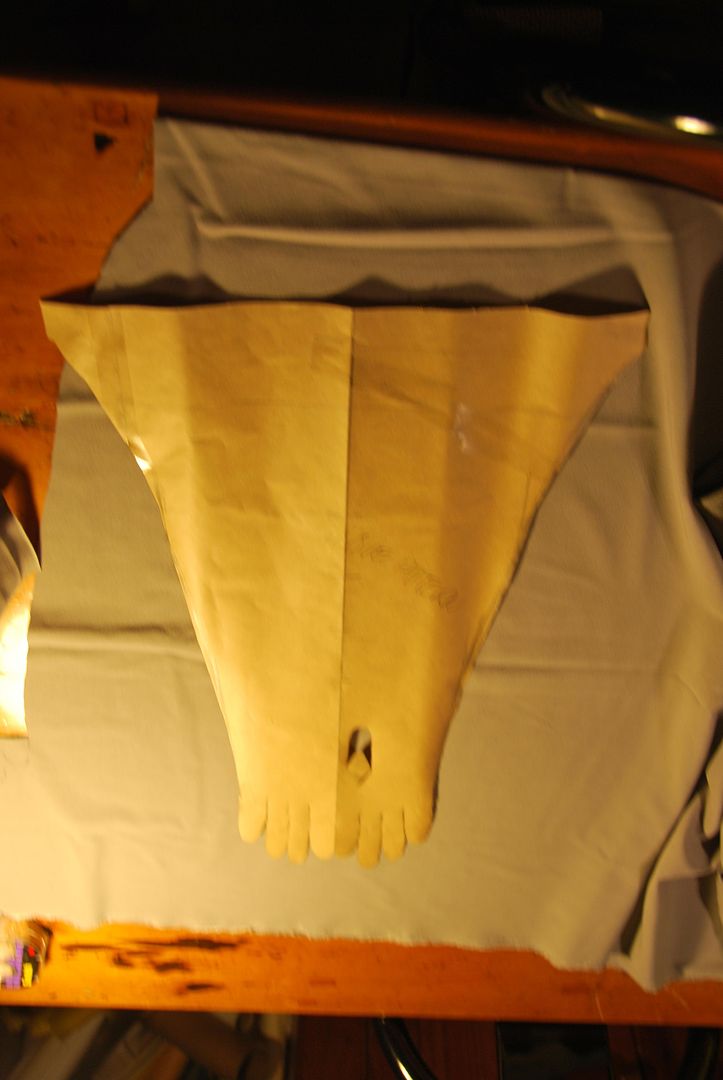
I started by buying and deconstructing a pair of well fitting costume gloves, from this I was able to make my own glove pattern. I made it go extra wide further up the arm so that it would be loose at the cuff.

My main problem was that the character's gloves are above the elbow, but loose fitting, meaning they essentially float there defying the laws of physics. My trouble was making them stay up without any seriously visible rigging...


It took hours of hand stitching to assemble those gloves. Above is the separate thumb piece which was slotted into the glove.

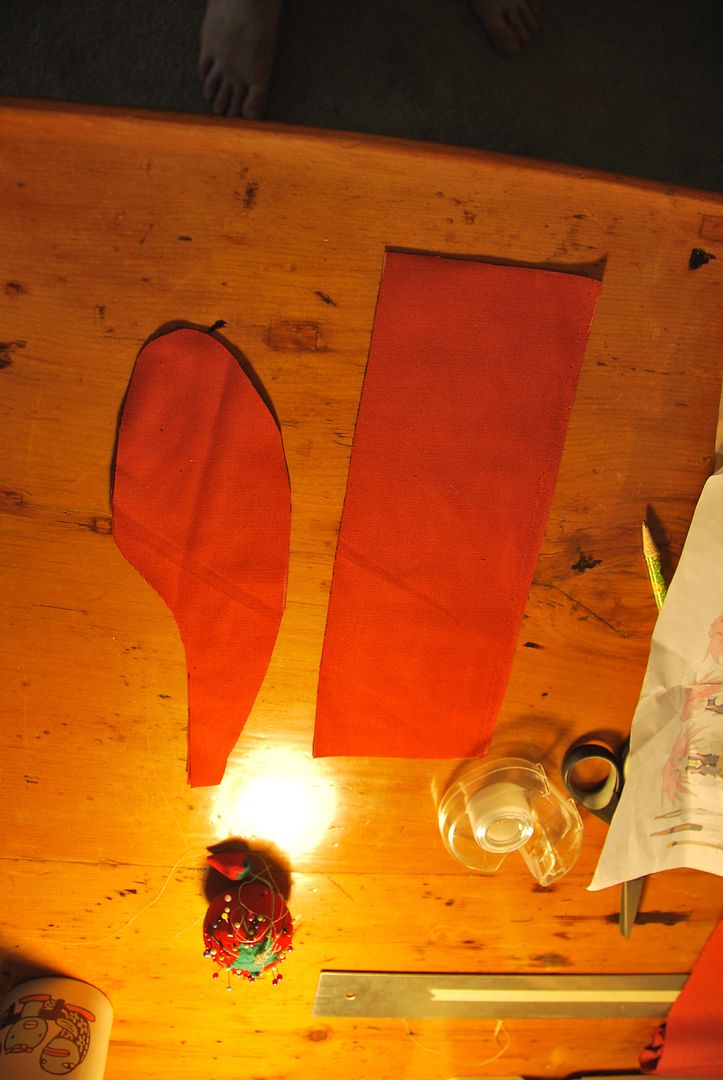
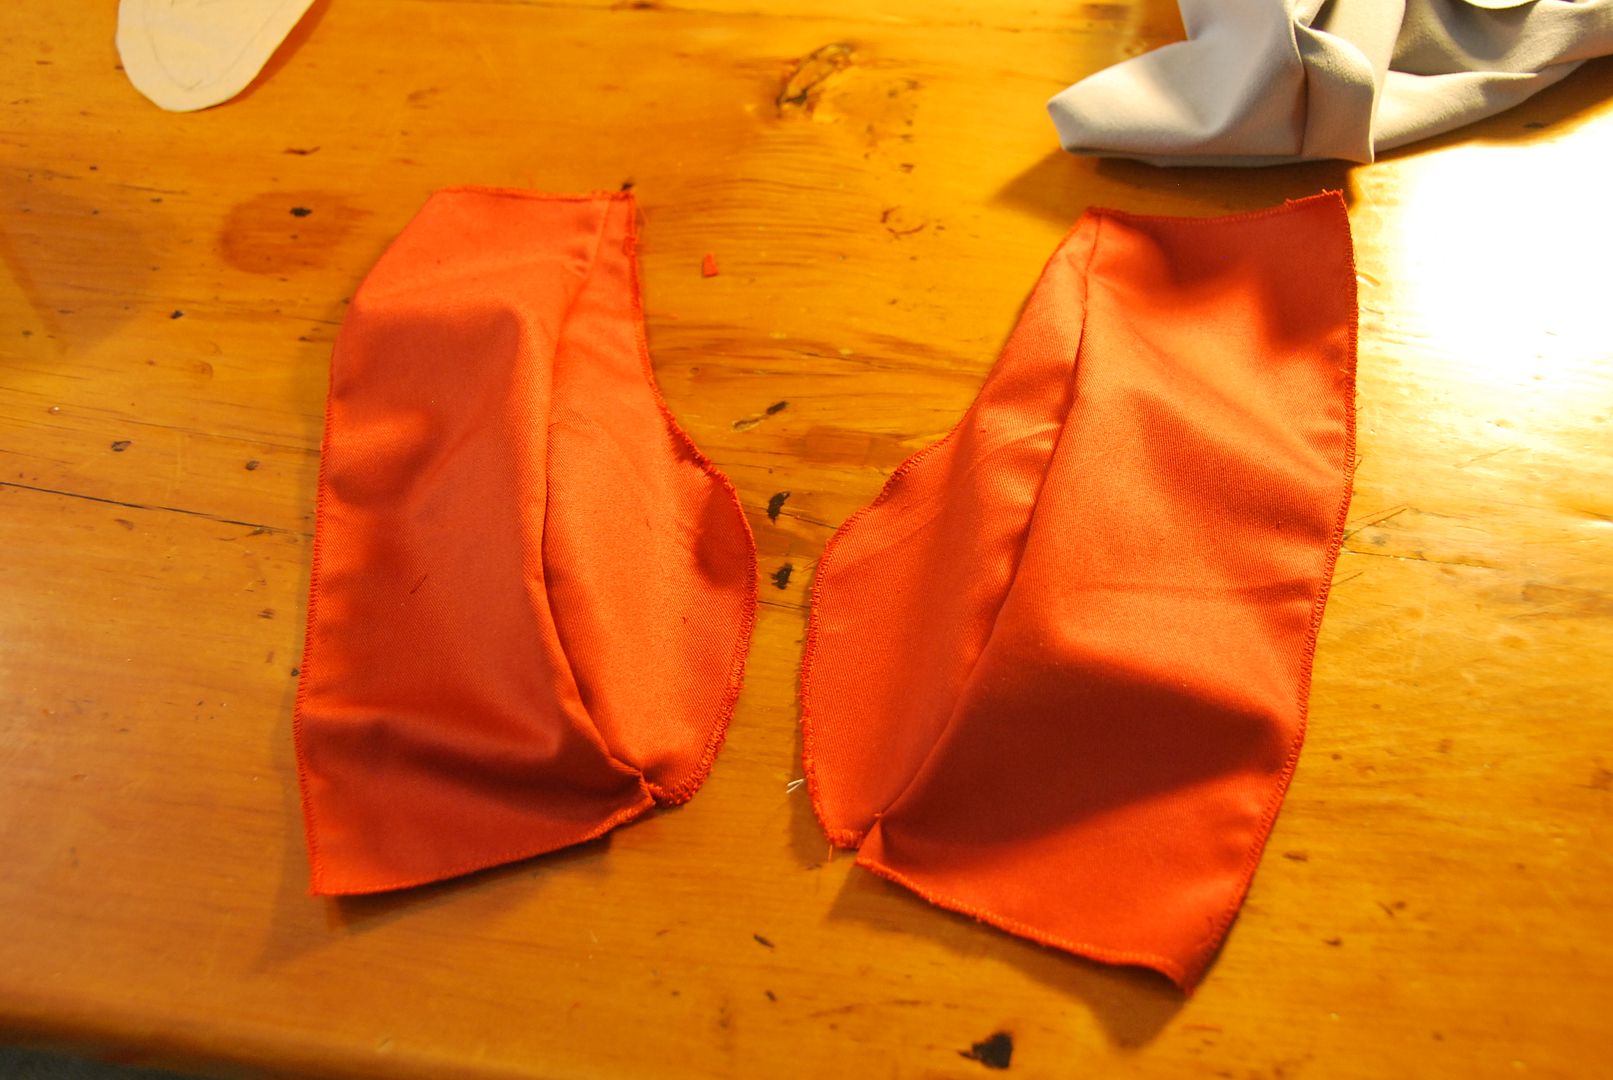
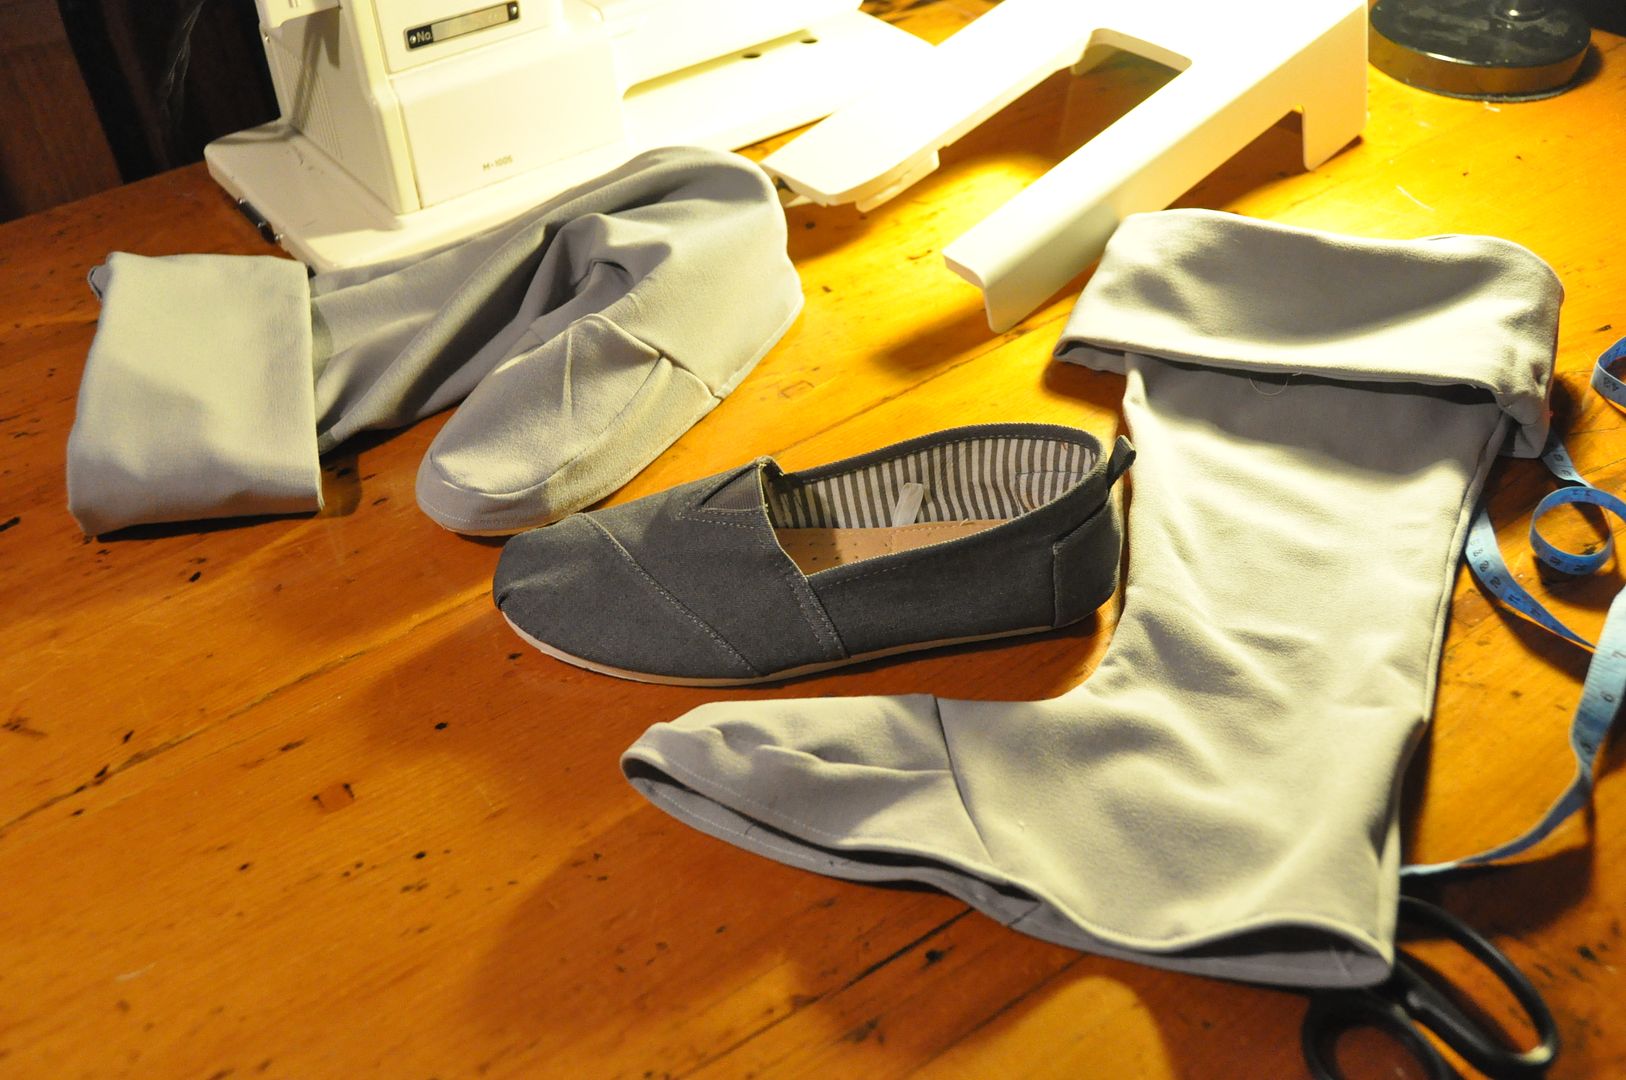
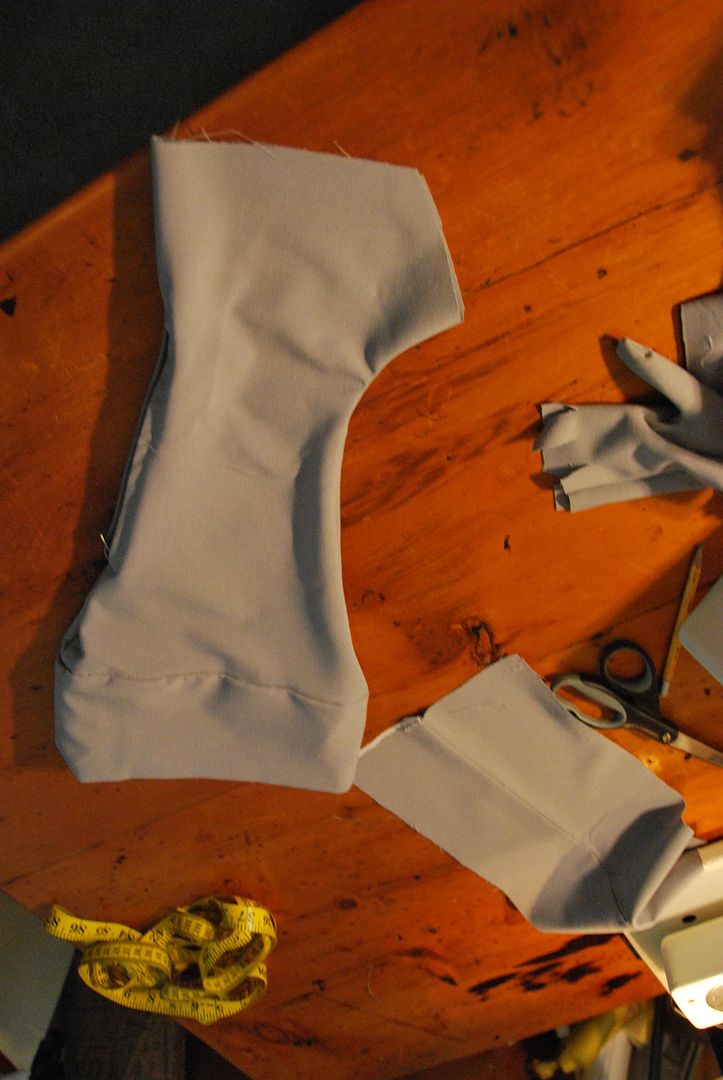
Left is my first attempt at making the boot covers, as you can see the cuff looks kind of wonky... Partially due to my inexperience working with stretch fabrics. This is where I stopped working on them for a year.
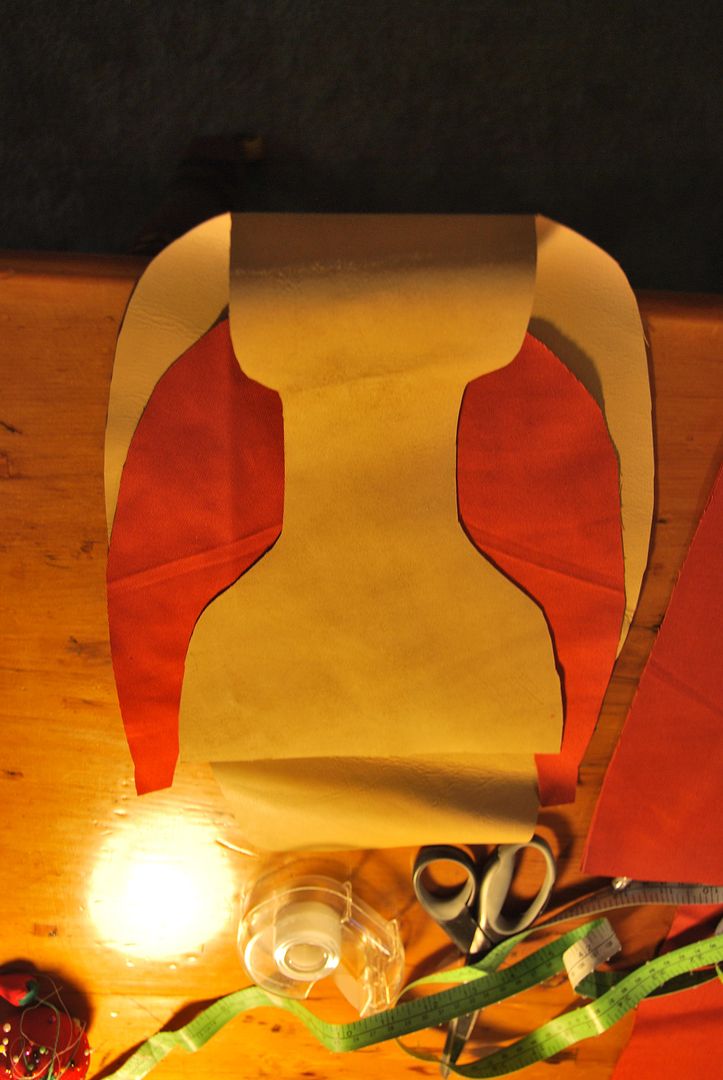
I patterned my boots to cover a cheap pair of canvas shoes I picked up at Ardenes. Above is the toe cover, left is the 2nd attempt at the boot cover. (from the inside)

I opted this time to do a fold-over cuff, which looked much cleaner, even though it isn't as accurate to the original design.
I replicated the cuffs on the gloves.

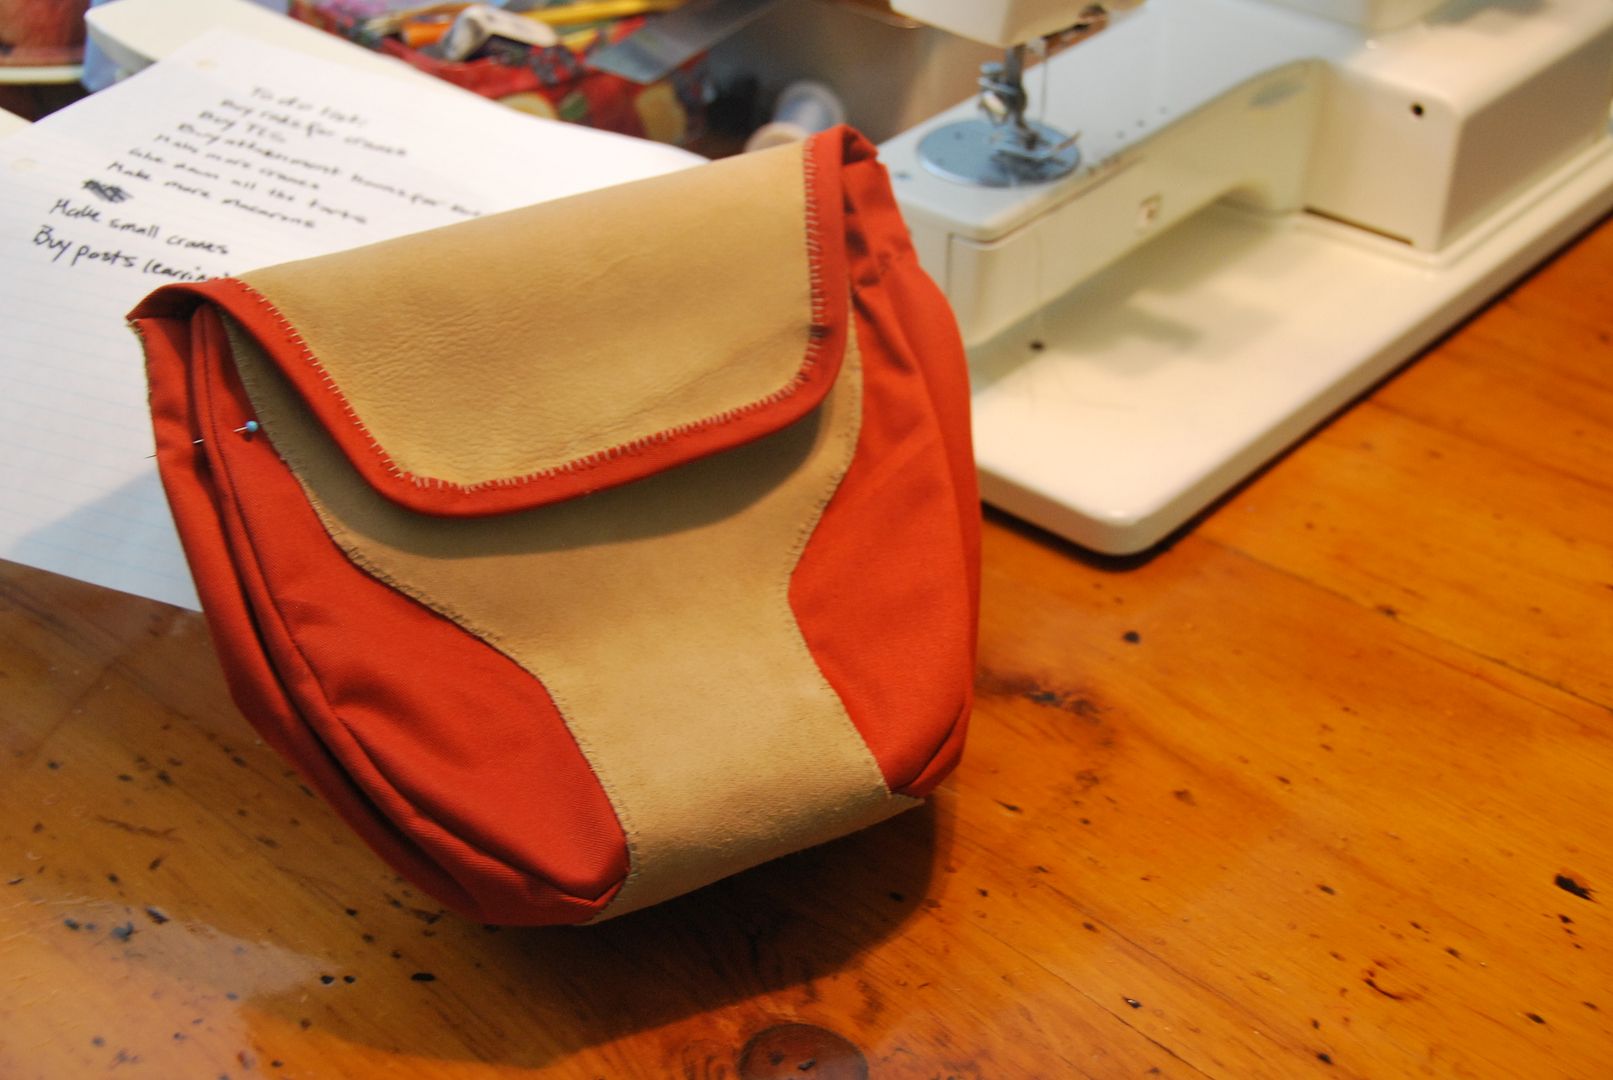
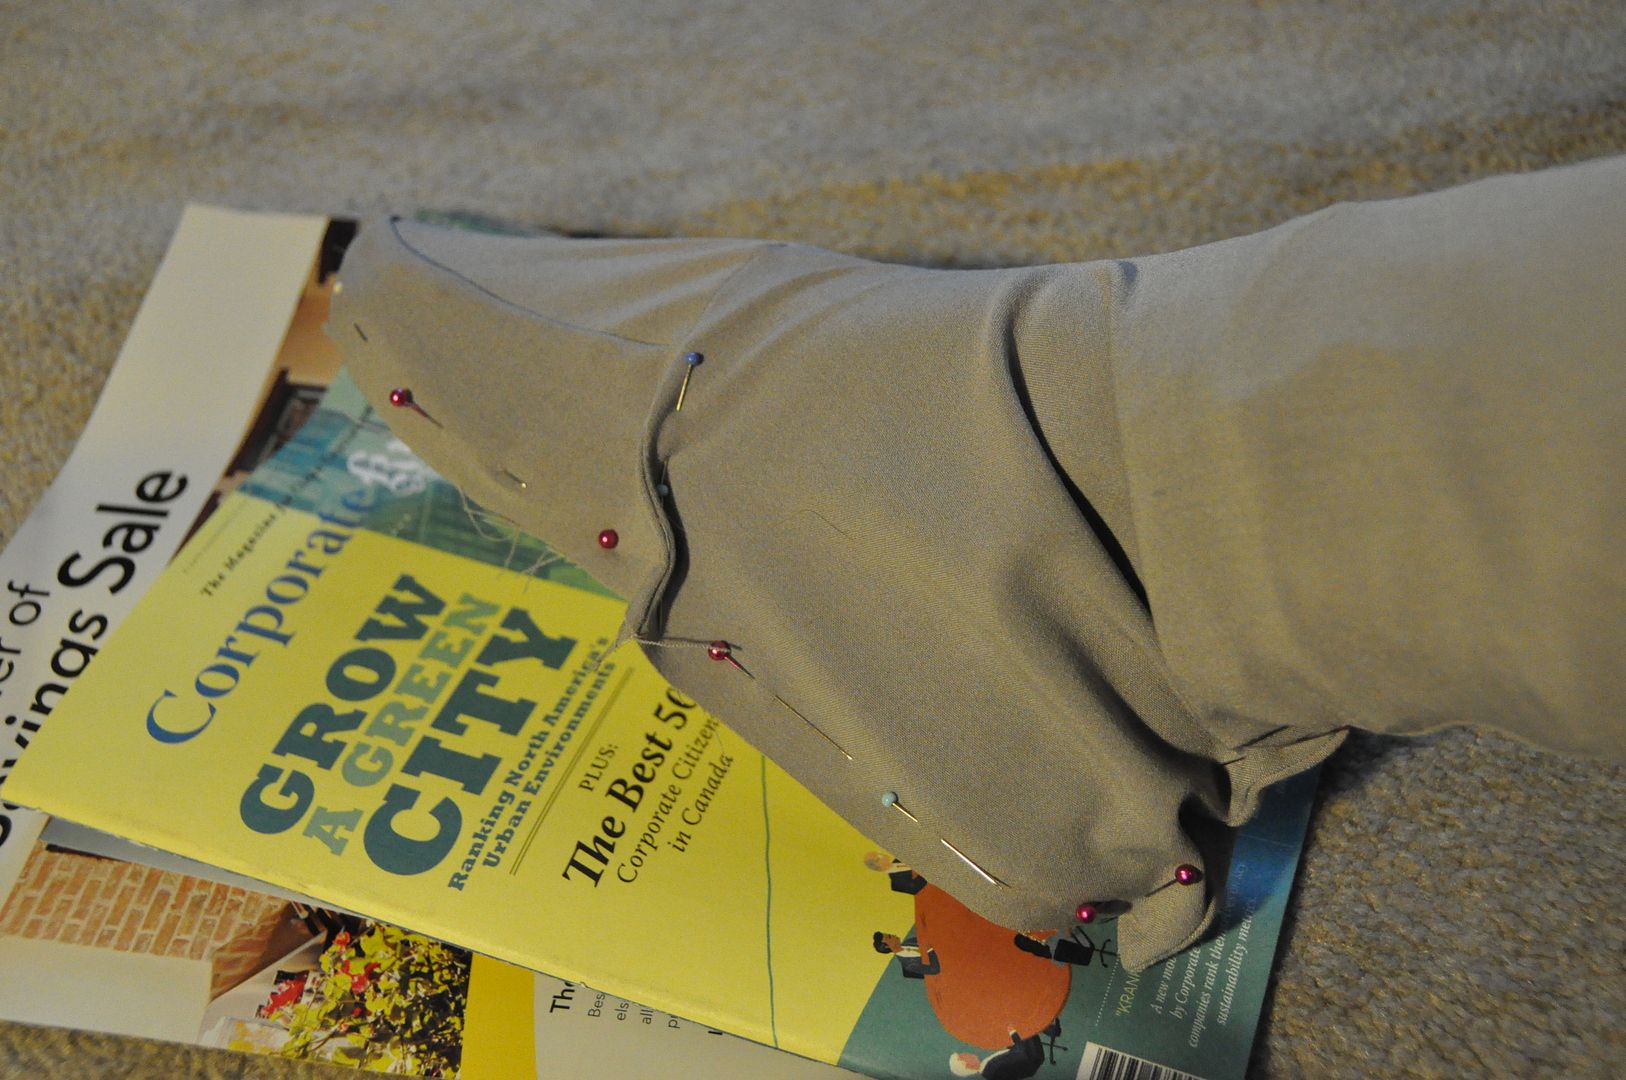
I marked where the shoe cover would be sewn to the shoes, then I hand stitched the two together. It took a while, but the result was a nice clean finished edge.
Then I sewed elastics to the inside so that the loose gloves and boots would stay up. These had to be far enough away from the edge so that they would be hidden inside. How I made the cuffs stay up was I sewed some short pieces of wire into the boot cover where it attached to the cuff.

At one point I had attempted to wire the whole boot, but I found it a) really uncomfortable, b) hard to keep it secure and c) it would be harder to pack into a suitcase, because the boots would have to remain upright. That and every time the wire got dented they were even more uncomfortable to wear... With the short wires only at the cuffs with fabric casings they were easy to fold up, and didn't cause any discomfort.
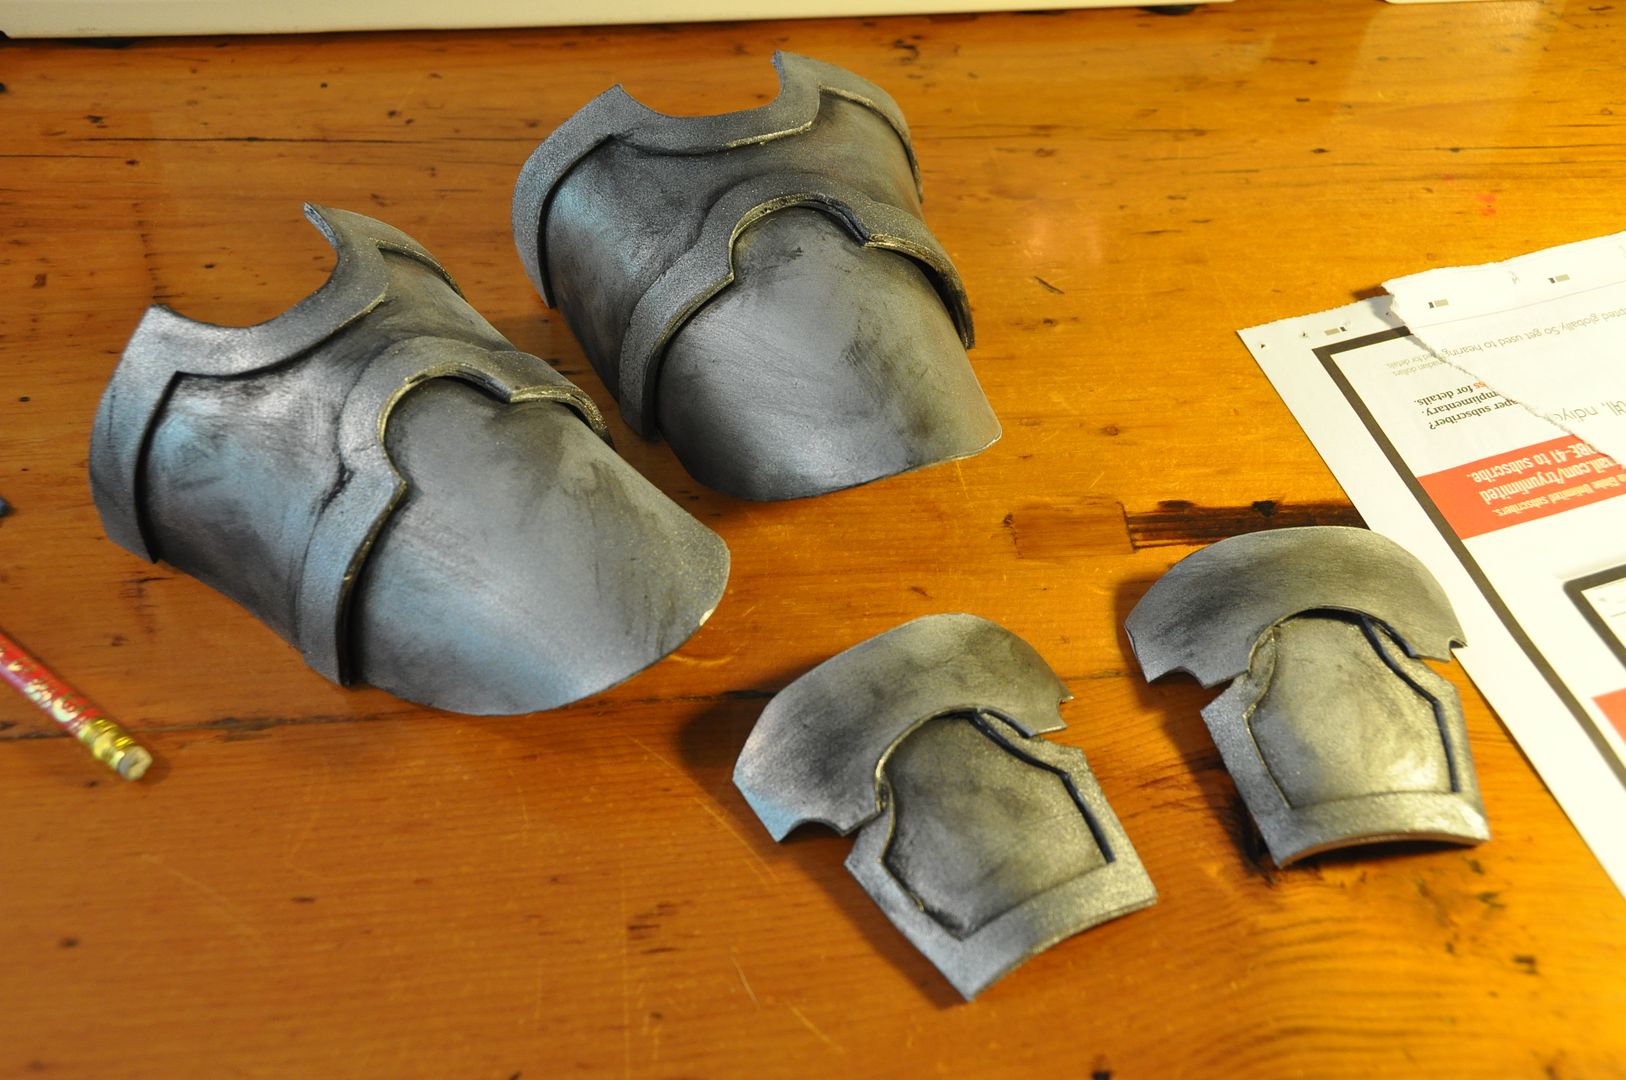
Next I got to work on the small bits of armour, following the same method as I did for Asuna. I used the leftover styrene from that costume to construct the toe and hand guards.

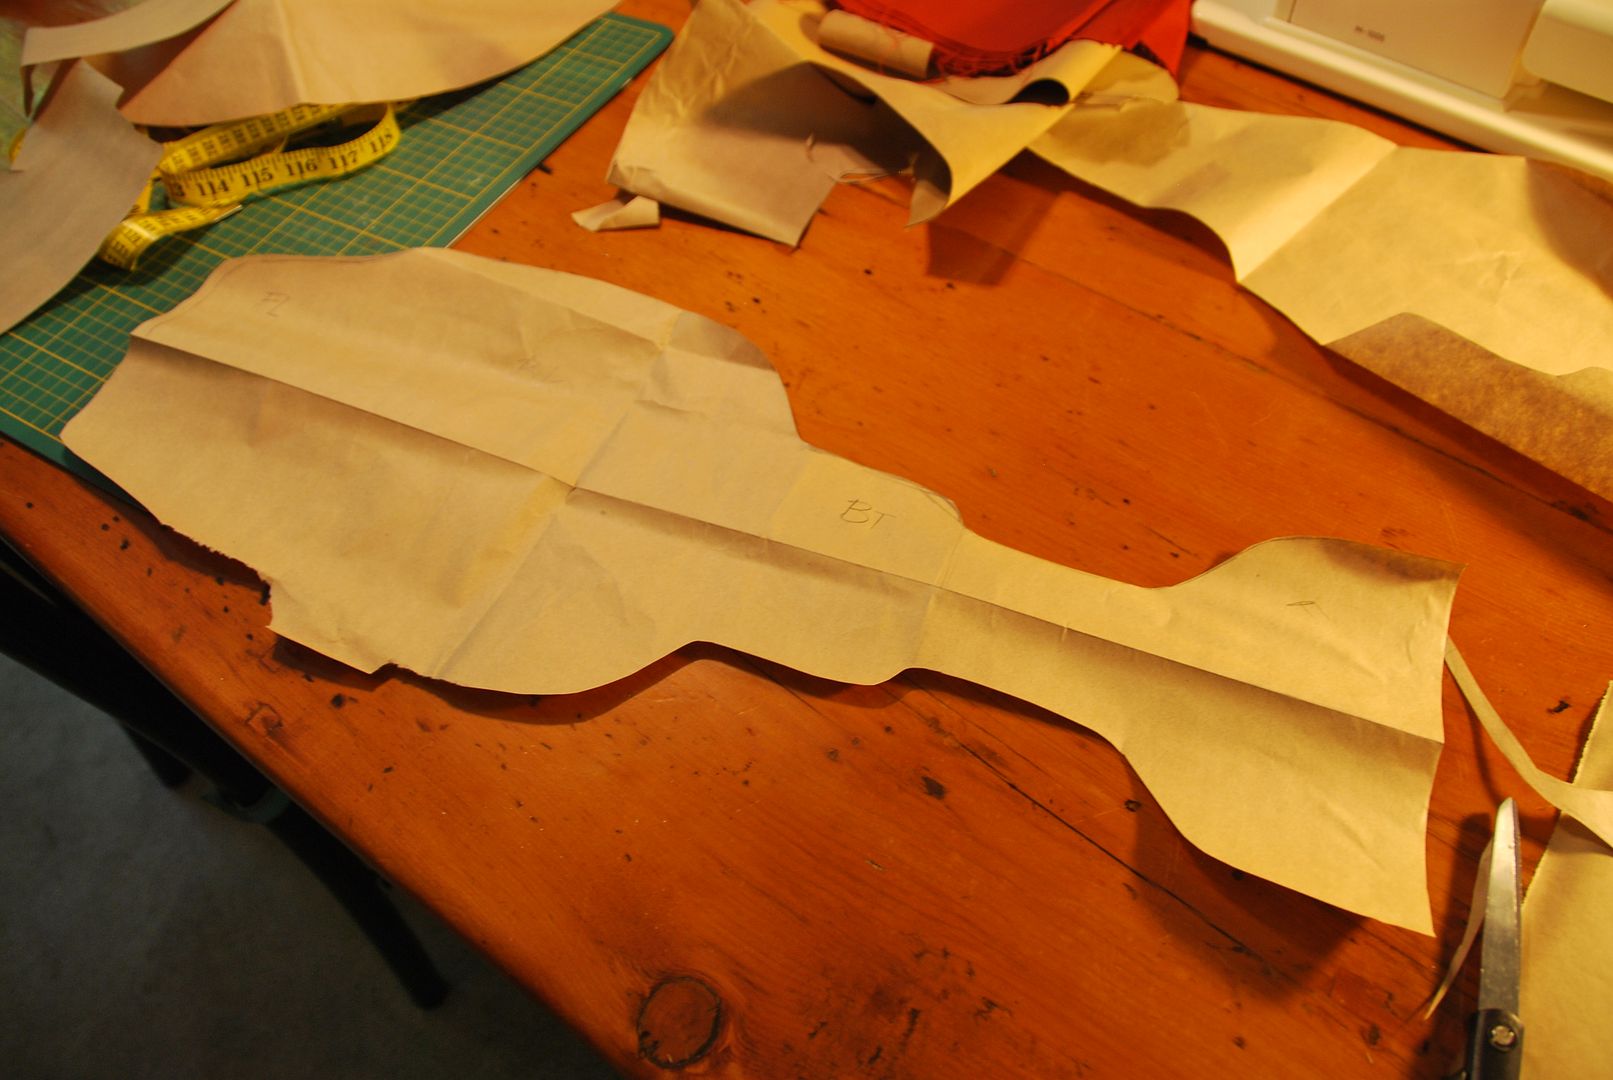
First I made paper patterns of the shapes I wanted, then traced them and cut them out. There were 8 pieces total. Compared to Asuna's this armour was total cakewalk.
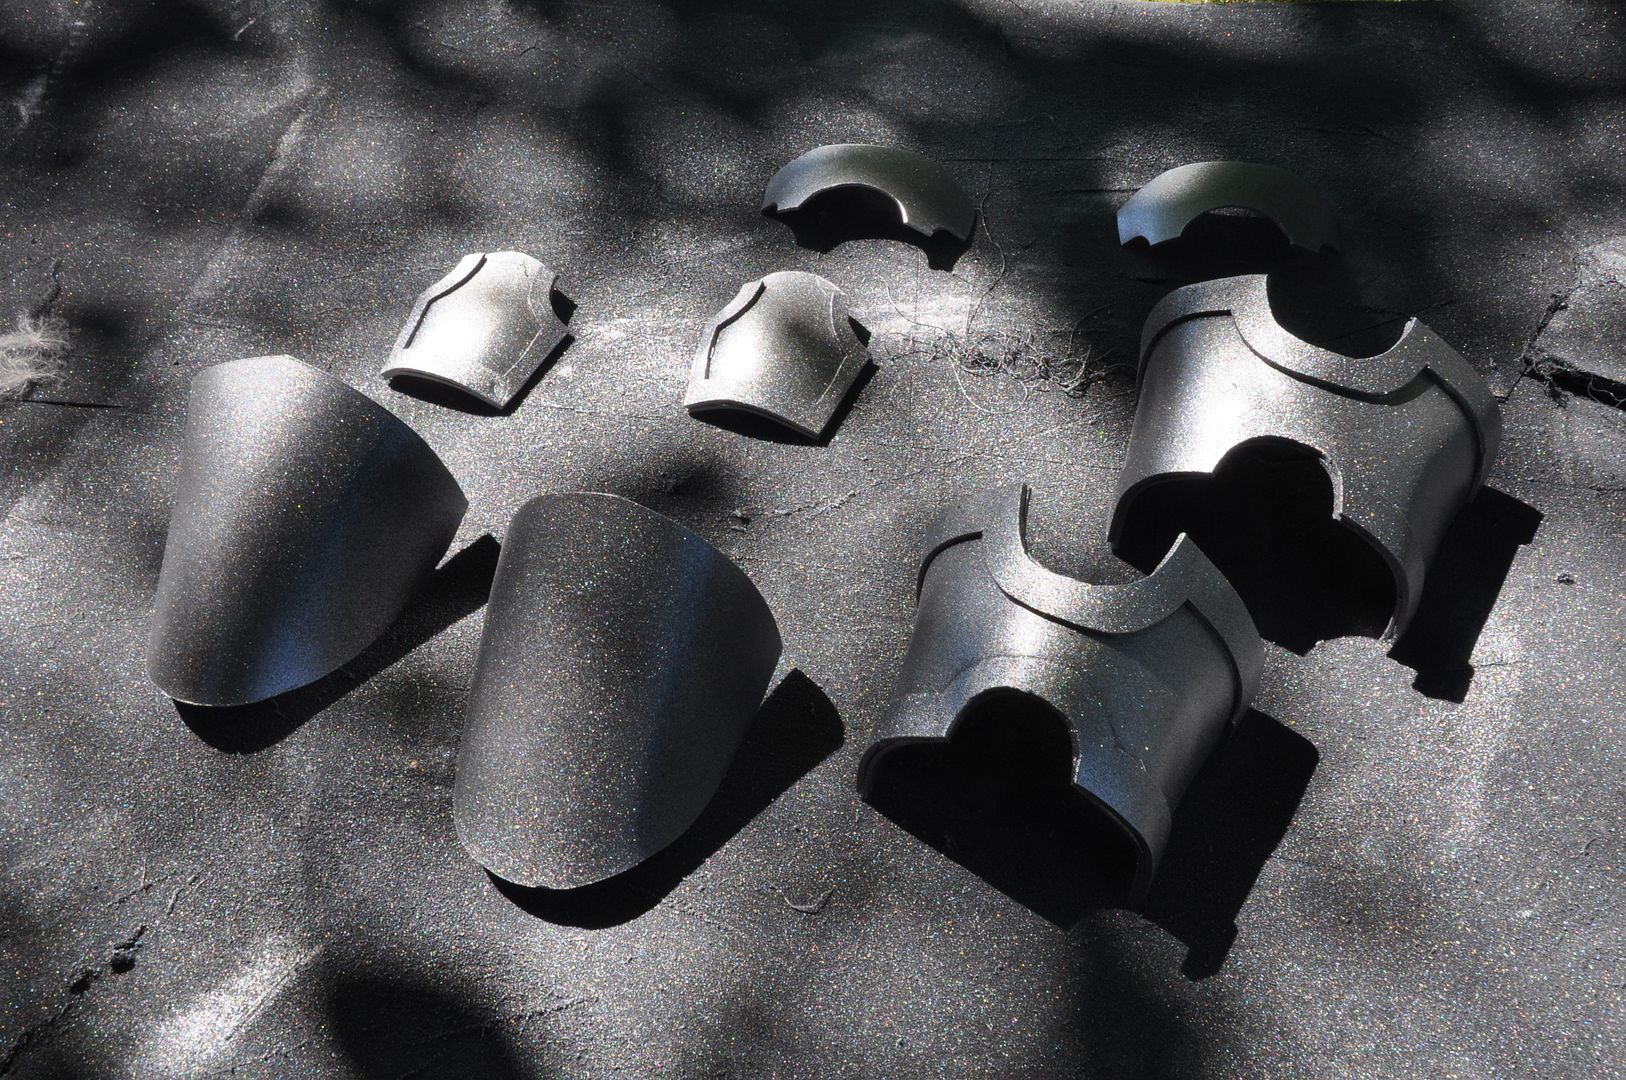
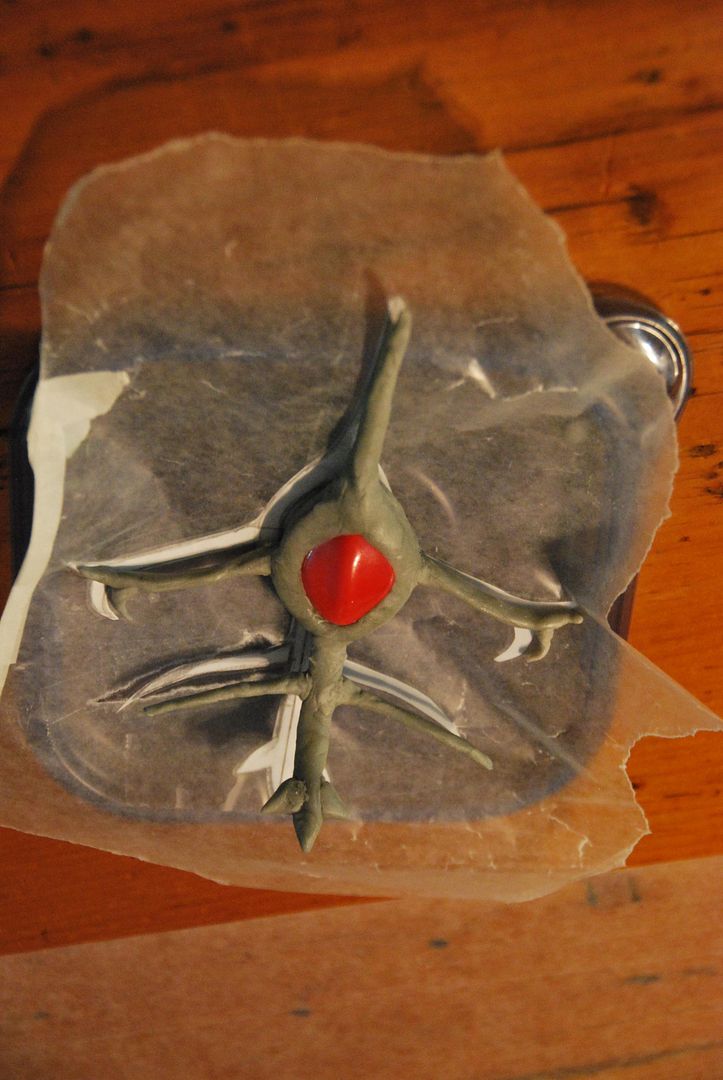
I then made the raised bits out of craft foam, and hot glued them on.

I used the same spray paint treatment as Asuna's: primer, matte black, then silver.

I weathered with sandpaper, glued all the pieces together, then aged them with black dry-brushing.
Lastly, the shoe armour was hot glued to the boots (while I was wearing them, so the armour placement would be correct). Then I rigged the hand guards with some elastic so they would be easy to take on and off. I painted the elastic grey so it would match the gloves.

Overall this project really benefitted from me not rushing to finish it the first year and instead applying another years' worth of experience to finish the job.

Friday, August 19, 2016

Brown Cloche Hat With Feathers


Let's take a look at my final millinery project: a blocked felt hat! I decided to do a simple cloche hat decorated with feathers. 
To make a blocked felt hat, you buy a "hood" or "capeline" which is 100% wool. (Or you can buy an 100% wool hat that has already been shaped and reshape it. You can get them at H&M.) 

You heat up a tea kettle that doesn't have an automatic shut off (so it will keep boiling--just make sure it doesn't run out of water, because you need the steam and to not set anything on fire). You place the hood/capeline over the steam spout and let it steam. It should have condensation on the outside and it will be really hot when it is ready for shaping. Use tongs to take the hood/capeline off the steam and place it over your desired block. I used a round crown top. Then you stretch it over the block, tie it tight and pin it in place. Let it dry for 24 hours. 

For my cloche, the crown and brim are all one piece. I was pressed for time with moving and was going to miss the last class, so doing a one piece hat was necessary--but also, I really like this style anyway.

If I were to do a separate blocked brim, at this point I would have carefully cut off the brim with an exacto-knife and blocked it on a brim block. For a one piece hat, I applied more steam and shaped the brim while the crown was still tied down on the block. I used rolled up pieces of fabric to shape around and let it sit while it dried. During this time I trimmed off some of the excess felt  from the brim to get it closer to the finished shape that I wanted.

When it was dry, I removed it from the block and set about finishing the edge of the brim. I decided to do a simple folded edge finish. I marked my finished edge and carefully trimmed the brim, leaving a 1/2" fold allowance. I folded it over, using bulldog clips to hold it in place so I could baste it. Then I carefully ironed it before stitching it as invisibly as possible. I ironed it again after stitching. This helped to give it a crisper edge.

Next I added the decorations and headband to the inside. I also gave it a label. I decided to accent it with more of that green silk I bought for the previous hat and feathers left over from my Forest Guardian costume. The goal is to stitch decorations on securely without making them look heavily stitched on,

I'm not too impressed with how the decorations turned out--specifically the feathers. I may replace them later. But I really love this shape--simple, yet elegant!


I've signed up for Millinery Part 2! So look forward to more hats, coming this fall! :D