Showing posts with label interfaced. Show all posts

Tuesday, June 28, 2016

Make Up Cases


Just a quick post showcasing some custom make-up cases I made for my sisters this past Christmas.

Both have elastic loops to keep brushes/pencils organized. The front flap on the teal one was a little tricky, as I am not used to sewing zippers in on such a sharp curve.

I thought it was a pretty fun way to use some of the print fabrics my sister got me in Japan. :)

Thursday, May 14, 2015

Hooped Embroidery Ornament

Just something I made for my sister as a birthday gift! She loves goats, so I made her a cute goat. I think he is considering the flower a tasty snack. Pretty cute right? I got to look up lots of reference pictures of adorable goats for this project.

This DIY project brought up fond memories of building the Forest Guardian costume, but with less pressure. I would like to do embroidery more often if I could.


I embroidered using embroidery floss on muslin reinforced with non-fusible interfacing. I trimmed off the excess fabric.

Making sure the screw was at the top, to hang it from later, I glued the fabric in place and tightened it. My glue of choice was Weldbond. I used a smaller bowl to hold the fabric in place while the glue dried.
Lastly I cut a circle of red felt to protect the back. This I glued onto the back. Then I just tied a string to hang it from! Easy!

Thursday, April 16, 2015

Newsboy Cap

Let's take a look at a school project of mine! I had to make a hat and then distress it. I chose to go for a zombie apocalypse theme! I guess this newsboy met an unfortunate end.

All the distressing was done with a rasp, and all the 'blood' is watered down acrylic paint.
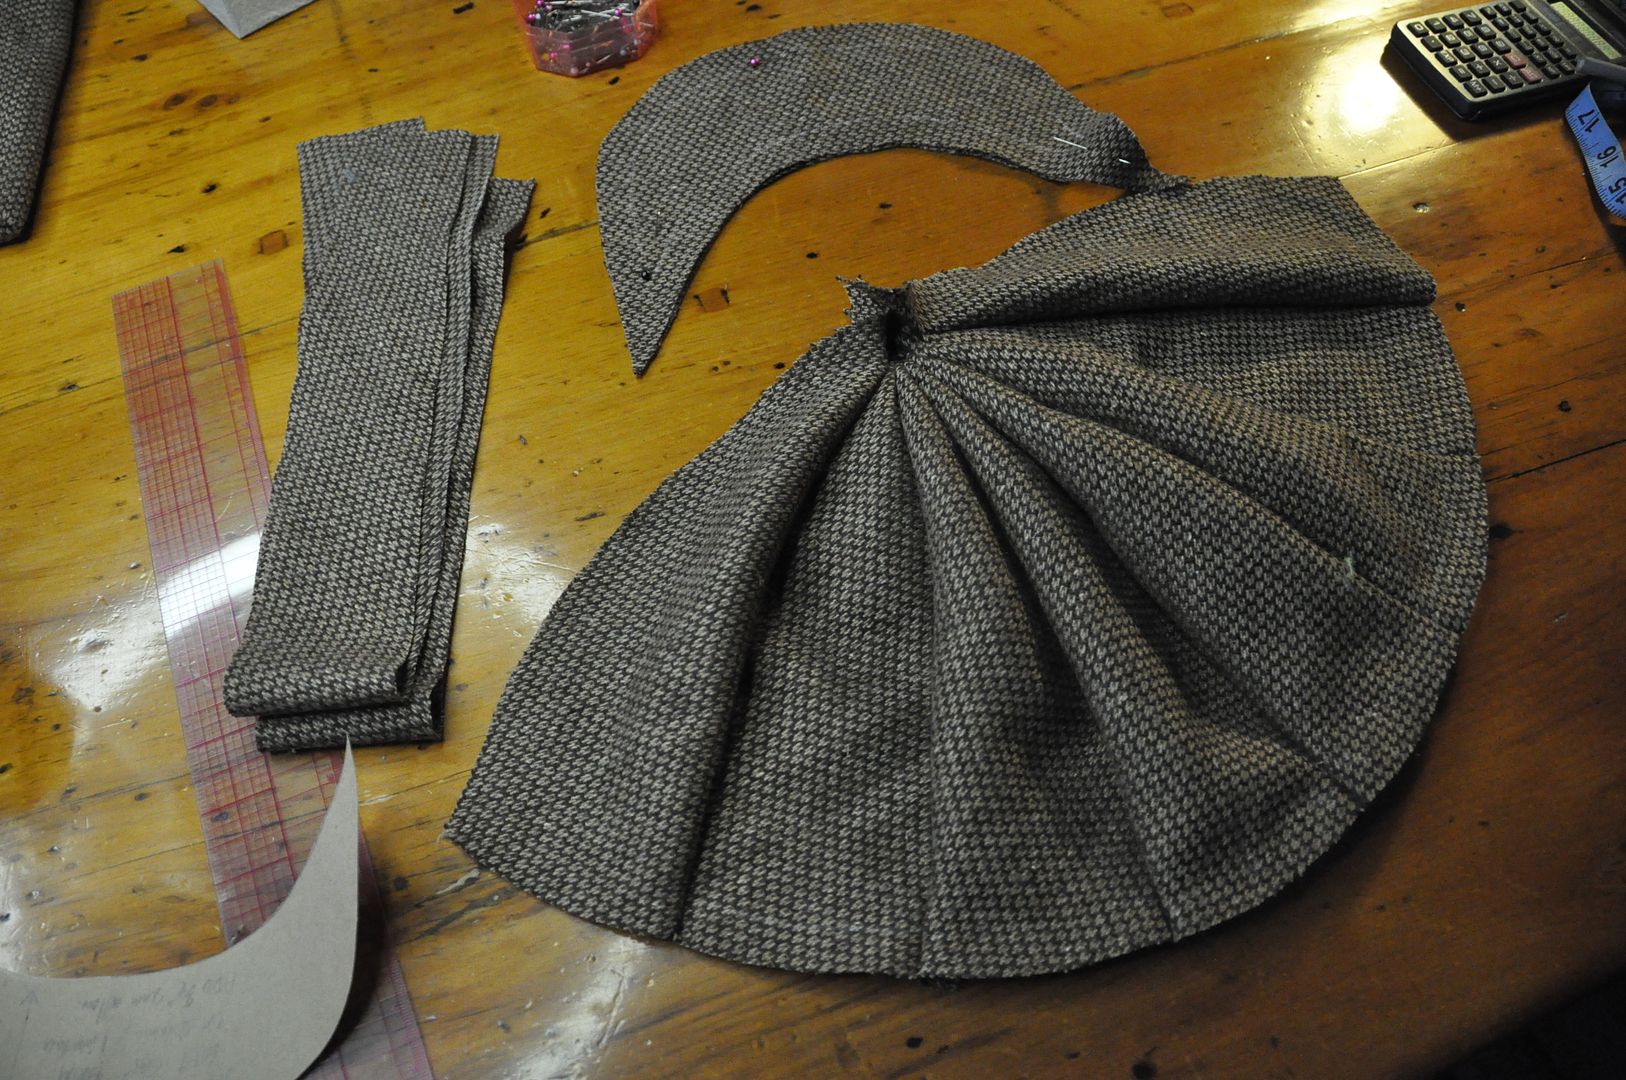
I started by patterning a 8 section hat using my head size measurement. I made sure it had a bit of poof to it, but not enough to make it super floppy.

I cut out all the sections and sewed them together.
I cut out the brim and sewed it right sides together along the outer edge. Within the stitch line I ironed on a piece of fusible interfacing. Then I clipped the excess fabric so it would turn right way out more crisply.

I turned it right way out and ironed it flat.


I created a lining for the hat out of blue fabric. It is sewn in the same way as the outside of the cap.

As part of the project requirements, I made a buckram hoop to put inside the hat band. This is wired so that the hat will hold its shape.

Next I sewed the hat band pieces to the brim.


The edge of the buckram was finished with a bias tape to protect the stitching.

The hat band was attached to the cap on the outside, but left open on the inside. This is so I could insert the buckram.

The inside of the hat band was stitched closed to the lining by hand. The inside of the completed hat can be seen below.
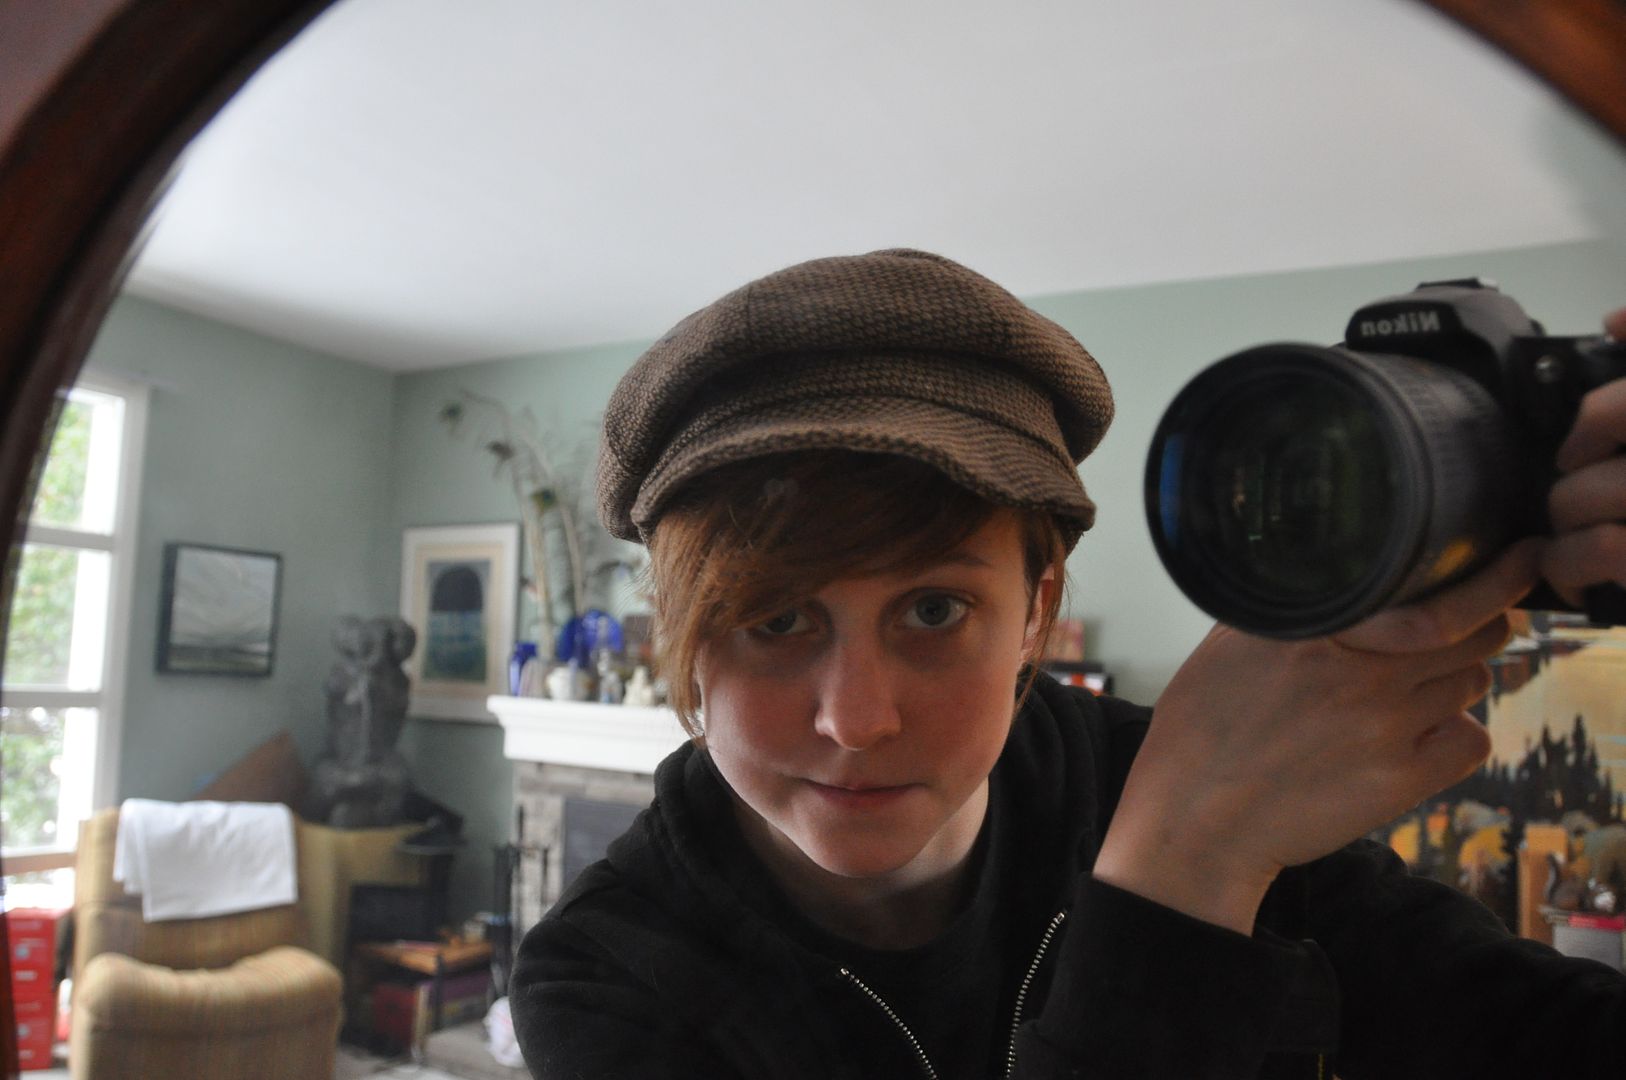
This is what the hat looks like before I wrecked it. Pretty cute!